
Let’s start with the before, shall we?
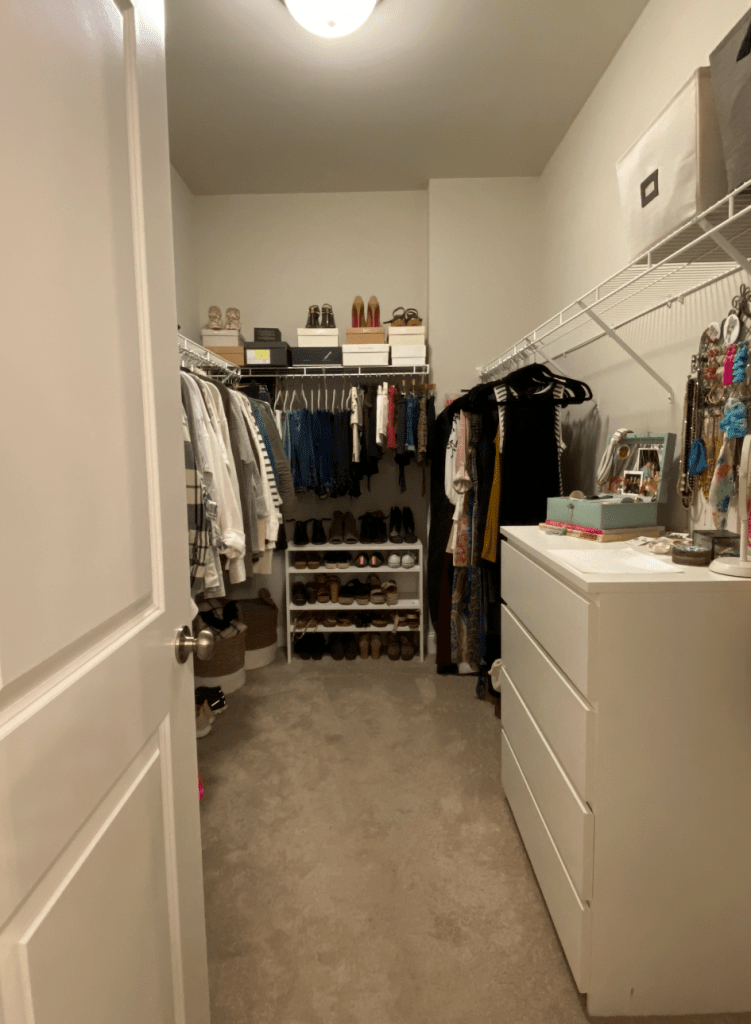
We are lucky enough to have two closets in our bedroom, and the bigger one is mine (duh…), but when built, it was made bare minimum. It had a single wire rack tracking around the room, how thrilling! It worked fine for almost 3 years, since it was large enough to add in a dresser and make it more functional, but after seeing so many amazing closet make overs on instagram, I kept feeling like that was a simple enough project that would be such an awesome upgrade to our home, and add some resale value. Win, win!
After doing some research, I decided the Ikea PAX system would be the most economical option for us, especially since I could customize it and install it myself, the cost was relatively low in comparison to other options! I jumped onto their site and started playing around with the PAX planner, it’s really easy to use once you have your measurements!
The PAX cabinet boxes come in two depth options, either 22+ inches, or 13+ inches, so I sketched out the dimensions of the closet, because I am a visual person and wanted to see how things would fit in there. (and yes, it’s to scale) And I realized that the 22″ box would end up landing in the middle of the door frame on both sides.. so I opted to have the 13″ boxes towards the front of the room:
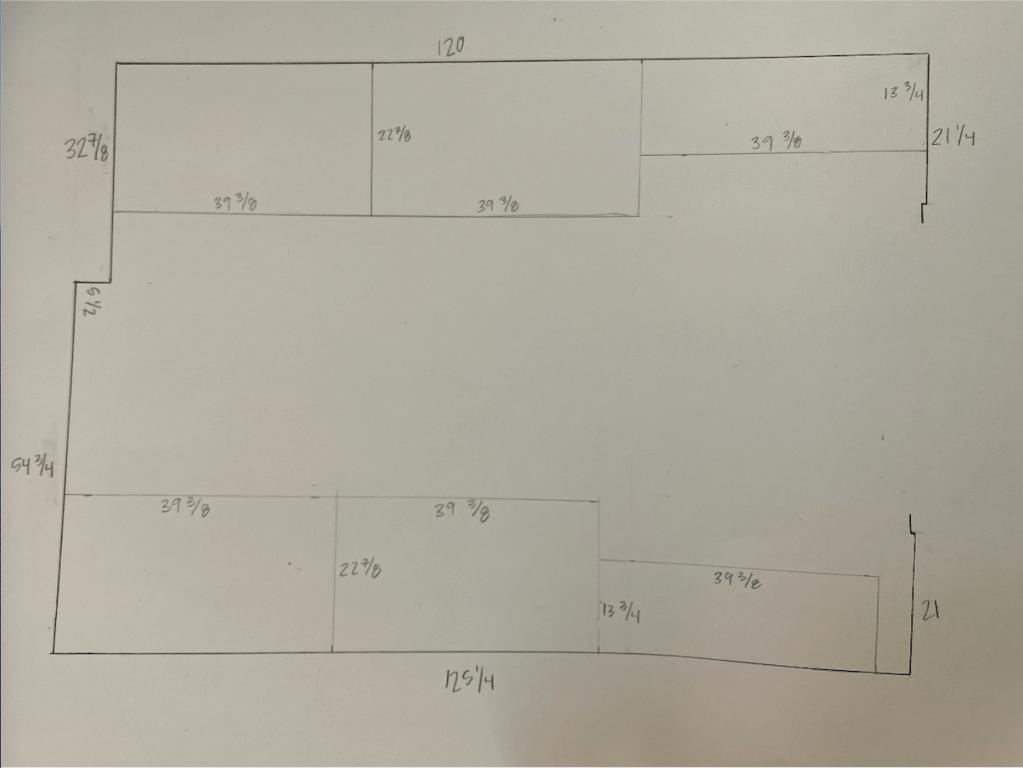
I felt like doing the smaller boxes in the front would also help the space to not feel too cramped (plus you can only have horizontal hanging bars in the larger boxes.. so doing 13″ boxes all the way around was not an option.) And just to be sure, I ended up taping out out on the floor of the room those dimensions to make sure it wouldn’t feel too tight in the back between the deeper boxes. It does visually feel like it would be tight, but the hangers/dresser i had in there before already came out that far, so it wouldn’t be any tighter than that thankfully. (and A LOT more storage too!)
You’ll also notice that there is that weird bump out in the back corner of the room, I’m not sure what its purpose actually is.. but luckily there was still the perfect amount of space to fit 3 of the largest size PAX boxes, at 39+ inches. But that did mean I would have a weird gap on the other side. I tried convincing Chris that we should build a mimicking box and drywall it out on the left side to match, but was met with reason that that was just over the top for 5 inches, ha!
Now that I had landed on the box sizes and placement, I started designing in the PAX planner what functions I wanted.
I sort of mimicked the lay out I already had to start, with the drawers on the center box on the right side, with my long hanging dresses next to it, and double hanging on the left side. And then would use the 13″ boxes for shelving/shoe storage.
Here was my plan for the right side of the closet:

I wanted to put a mirror above the drawers, and have a sort of ‘landing zone’ as a catch all for my jewelry and little things, similar to the set up I had previously. I wanted just an accent mirror here instead of a full length mirror at the back of the closet because we already have a full length one right outside our bathroom in the bedroom, so seemed silly to have two so close to each other!
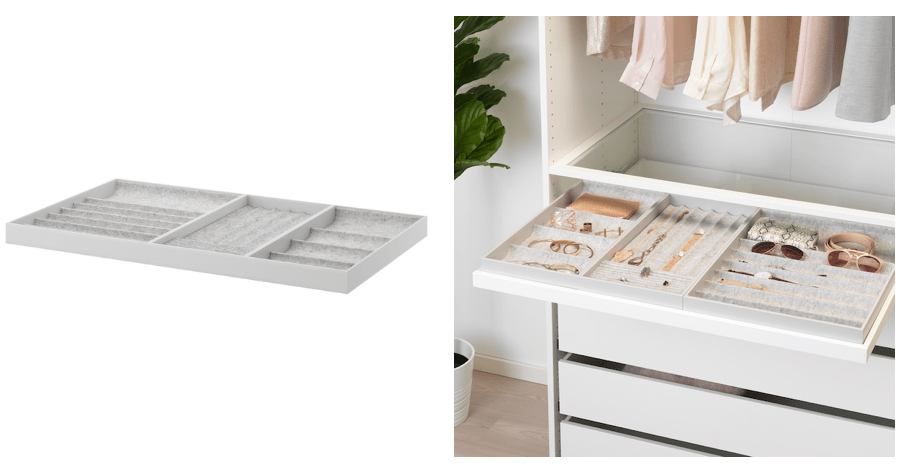
I also added the pull out tray above the drawers for more jewelry/accessory storage instead of having a hanging jewelry rack like I had previously. I always felt it looked messy, and needed to do a jewelry clean out anyway! I decided to order one of these Komplement inserts they offer, but it is on a crazy back order – so hopefully by Mid May I’ll have this!
After toggling with the other side for a bit, I decided last minute to add drawers instead of all shelves like the right side. I knew it wouldn’t be entirely filled with shoes, and I’d end up doing basket storage on some of the shelves, and decided the drawers in the end would be easier and cheaper!
Left side:

I ended up picking up the larger 39″ shelves for the top of the large cabinets from the ATL store after I started assembly, once I realized really how tall these bad boys were, and that I would have extra space at the top of the boxes once my hanging bars were at a height I could reach!
I got really lucky that when I placed the order in Feb that all of the other pieces were in stock for shipping, because it is hit or miss to get every piece in stock from them at once these days!
Total cost of all of these items ended up at $1,297.17, then add tax and $50 for shipping (so worth it.. this stuff was HEAVY, I don’t think we could have managed getting it from the store ourselves!) rounding out at $1,462.62 for the final total!
All that being said, it did take a month+ to actually get everything shipped to me. And during that time of course I thought more and more about the closet, and decided that the carpet needed to come out! We plan to replace all the remaining carpet in our upstairs bedrooms (it’s the worst possible builder grade carpet available..) and I didn’t want to install the cabinets on top of this carpet, and not be able to easily rip it out and replace it! PLUS, when we had the builder replace the carpet in the office on the basement level, we had 3 left over boxes of the flooring stored away. So the flooring was FREE! and it was the perfect amount of flooring to fit in this closet (like literally had 2 small pieces left!)
Once all the Ikea stuff arrived, I finally started to clean out my closet. (I was still recovering from a knee injury in Feb, so didn’t have the capacity quite yet to get to the heavy lifting..) so this project really didn’t start until almost end of March! But once it did it had to move quickly because all of my clothes lived in piles in the guest bedroom.. not ideal!
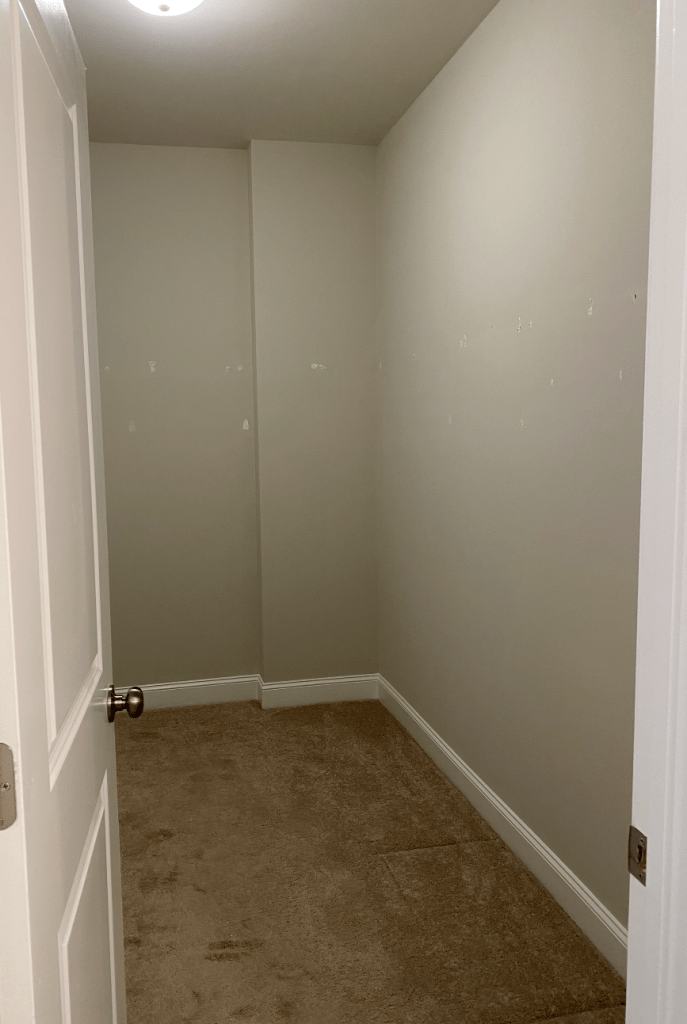
Once I got all my stuff out, I took the wire rack out. The builder did extra mounts on the rack to secure it to the studs, and did a number on the walls.. so I had a lot of patch and repair work to do, but luckily the bulk of it would be hidden behind the cabinets so I just patched and sanded to be smooth and that was it!
At this point I decided that I was going to do this project without any help, Chris was only allowed to teach me how to use the saws for the flooring, and help lift the cabinets since thats a two person job! I painted the walls and ceiling white (why the builders painted our ceilings a dirty yellow/grey color, I will never understand..) and only painted the parts that wouldn’t be hidden by the cabinets. After that the carpet came up! (check my Instagram for some videos of me doing that with a knee brace on, ha!)
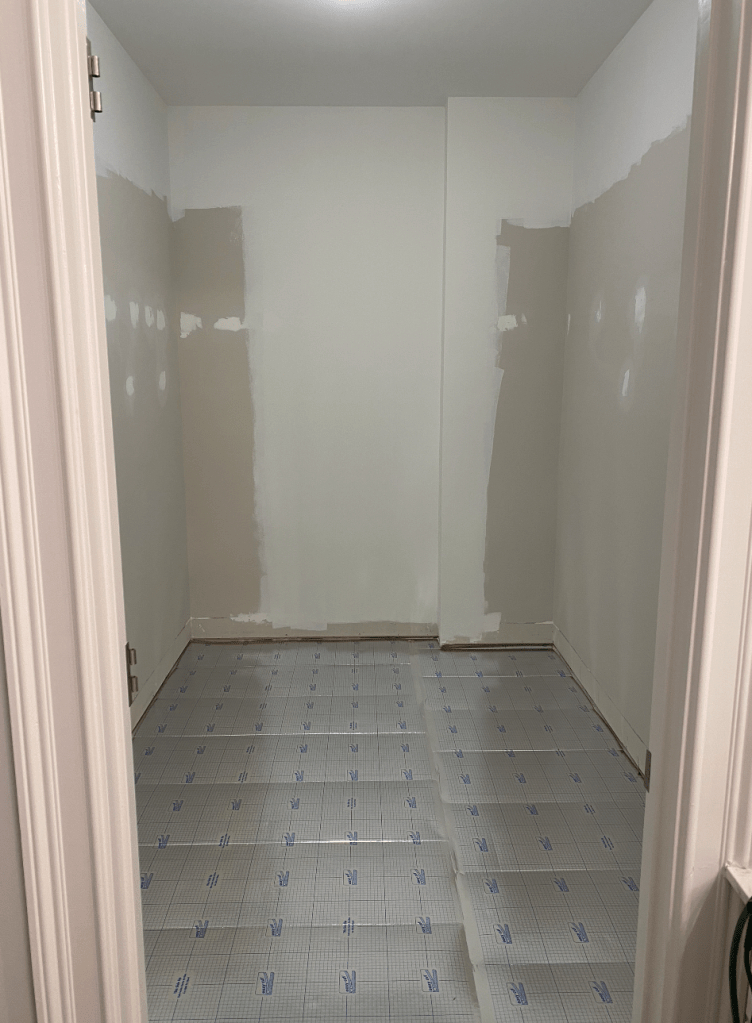
I decided to add this underlayment over the subfloor as well, to help buffer out any slight imperfections before laying the engineered hardwood. The floors were pretty level (shockingly, considering how warped the walls in our house are..) so the underlayment was a good option to help give a little cushion between the plywood subfloors and the hardwood. It also was a moisture barrier and a sound dampener, since this is right off of our bathroom! This is what I used, picked up just 1 pack from Lowe’s and had plenty:

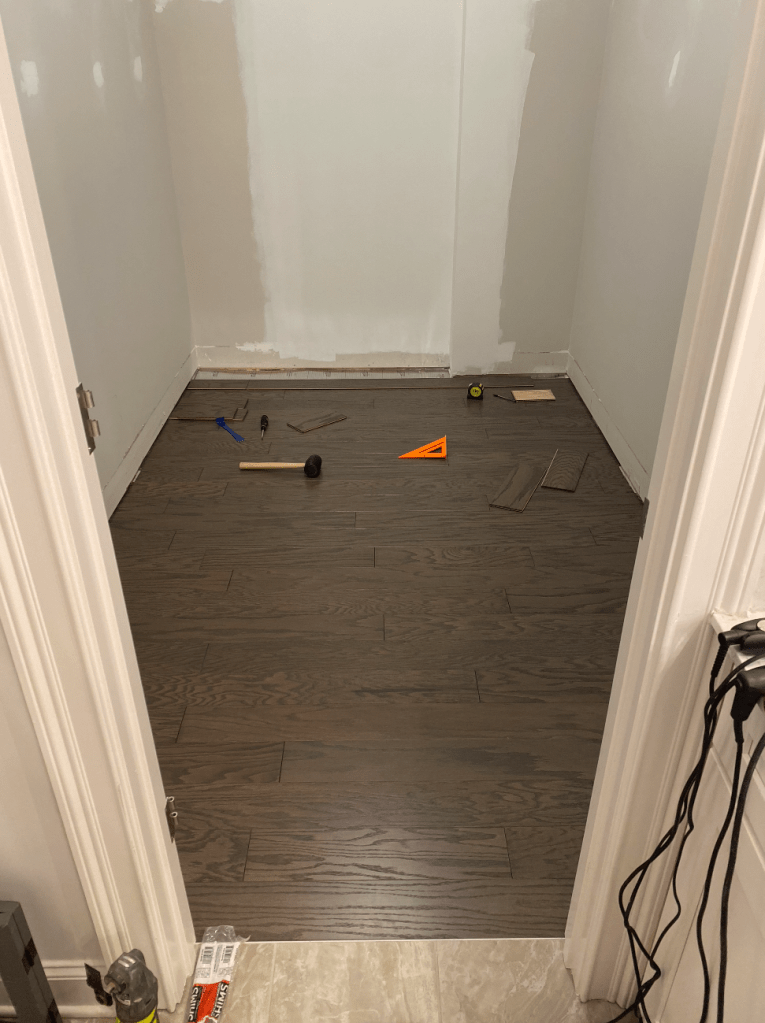
After this I started laying the flooring! With engineered hardwoods, you typically use a special stapler that fits into the grooves where the pieces lock into place, but I didn’t have this so I used my brad nailer (in probably fewer spots than recommended) to secure the wood. Knowing that there would be heavy cabinets on top as well, I wasn’t really worried about this stuff going anywhere!
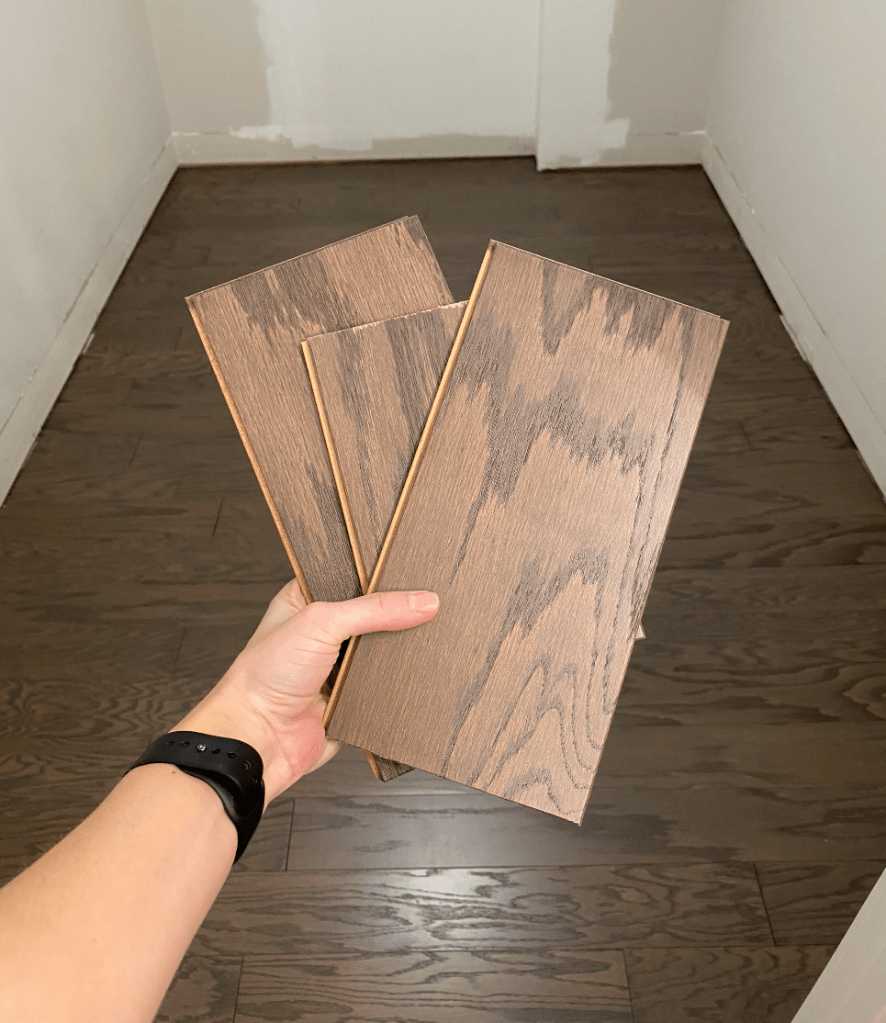
Remember how I said it was JUST enough flooring? Here are the remaining pieces I had after completion!!
So after the flooring was finished up, I got working on building the boxes! And if you’ve ever built anything from Ikea before, you know that it takes a small bit of your soul while doing it… especially at this scale. Everything has to be hand screwed in (no drills or you’ll split the wood) and you have to nail in the back piece of the cabinet with a million tiny nails, so you’ll have blisters on your hands after building just 6 cabinet boxes…
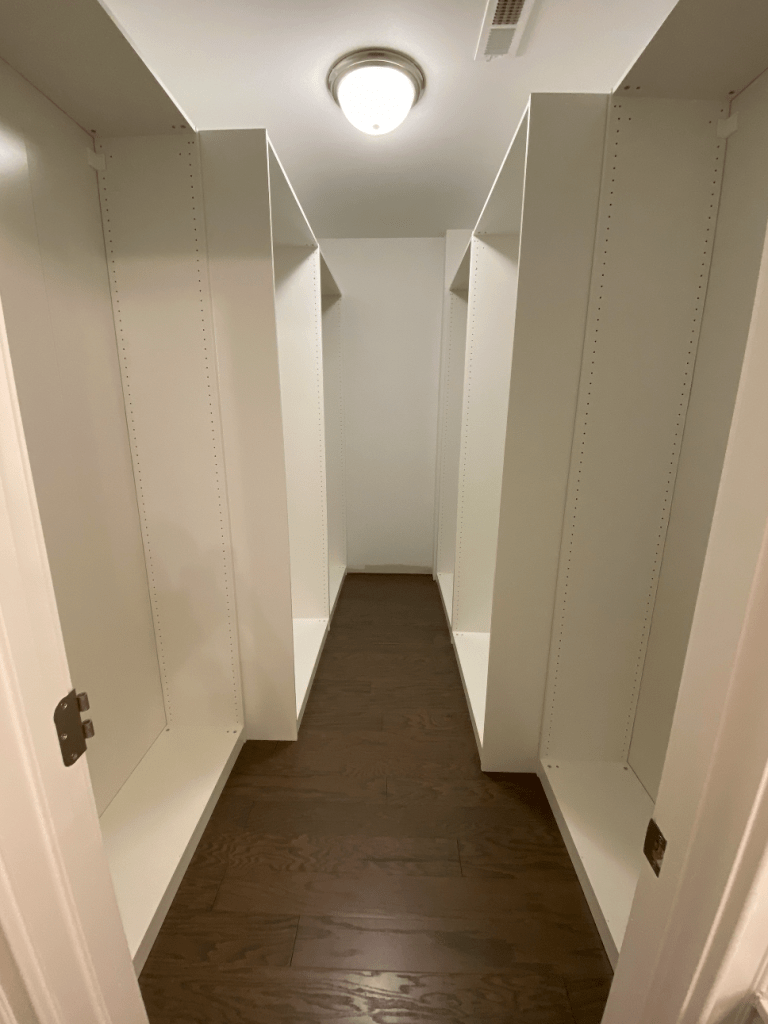
I had to recruit help to get the boxes lifted in the room after I got the first box in myself, just because of the tightness of the space and door frames and such. But here is the space with the boxes installed!!
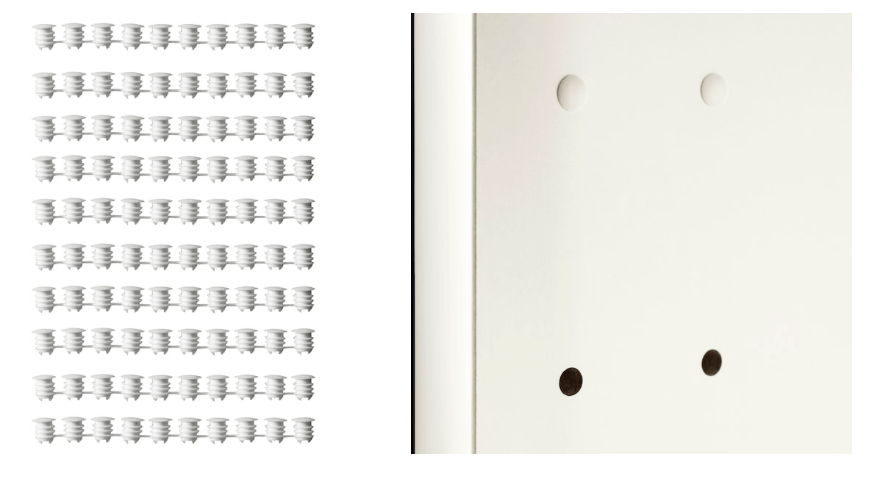
We ended up bumping the left side of the cabinets flush to the back wall, so there is about a 5″ gap at the front of the closet, but since there ended up being about a 2″ gap on the other side, we just painted and trimmed them out so it doesn’t really look like a mistake in the end. We secured the boxes to the walls using these 100Lb drywall anchors and screws:
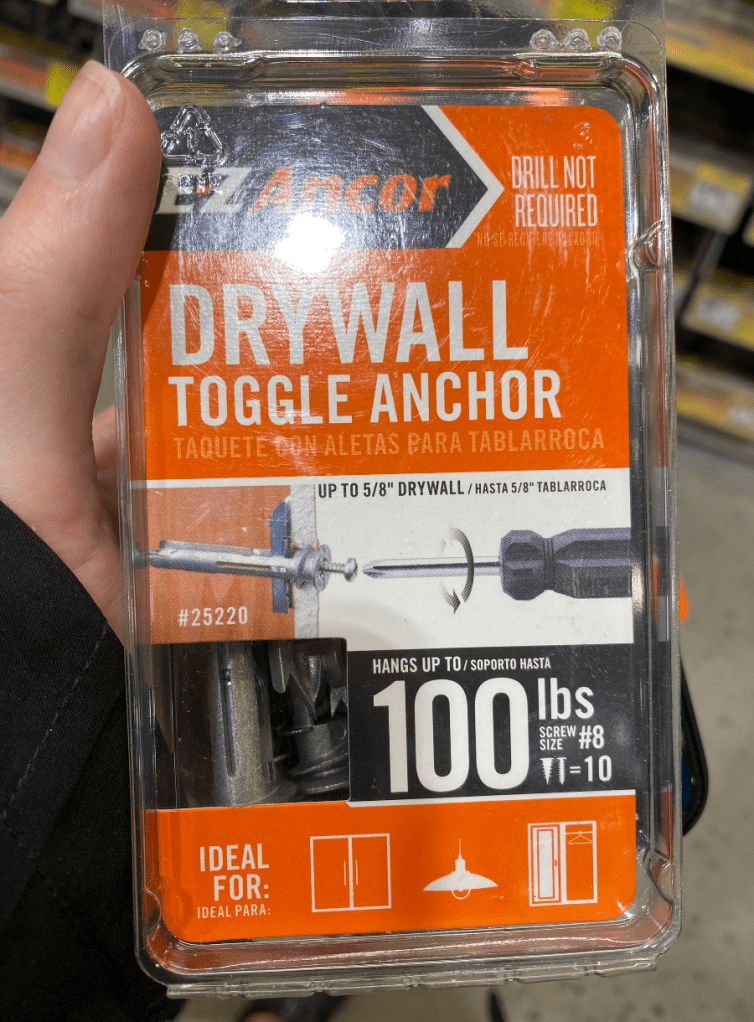
Having 2 per unit, they were very secure and I’m not worried about the weight of the clothing or drawers bringing these down!
Next installing all the shelving/drawers. This alone took two nights of work (my poor hands were toast). Check that out on instagram also! I added trim along the back wall and front two walls also using this MDF trim from Lowe’s as well:
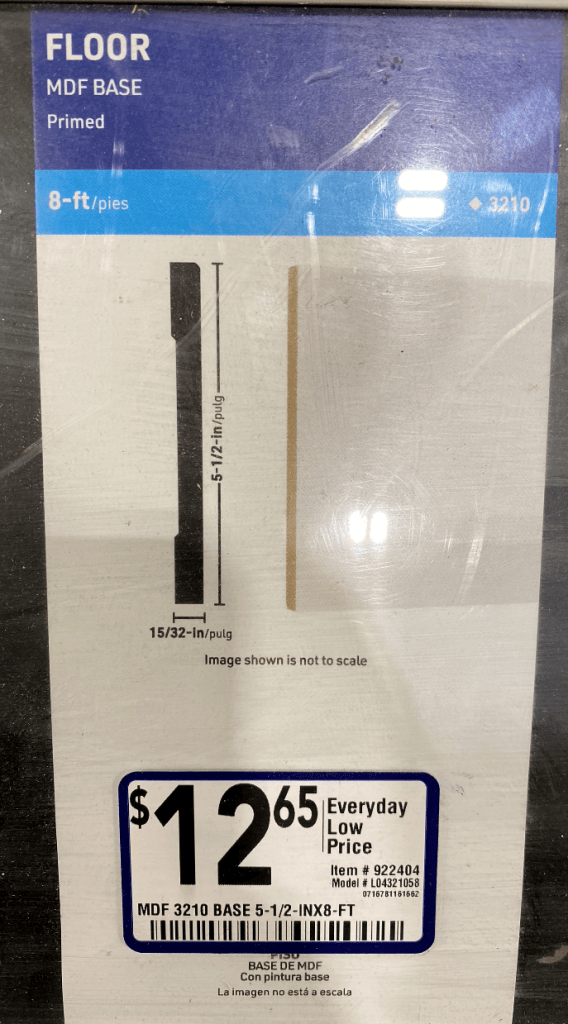
I caulked this to the cabinets for a seamless look where it met, giving that true ‘built in’ look.
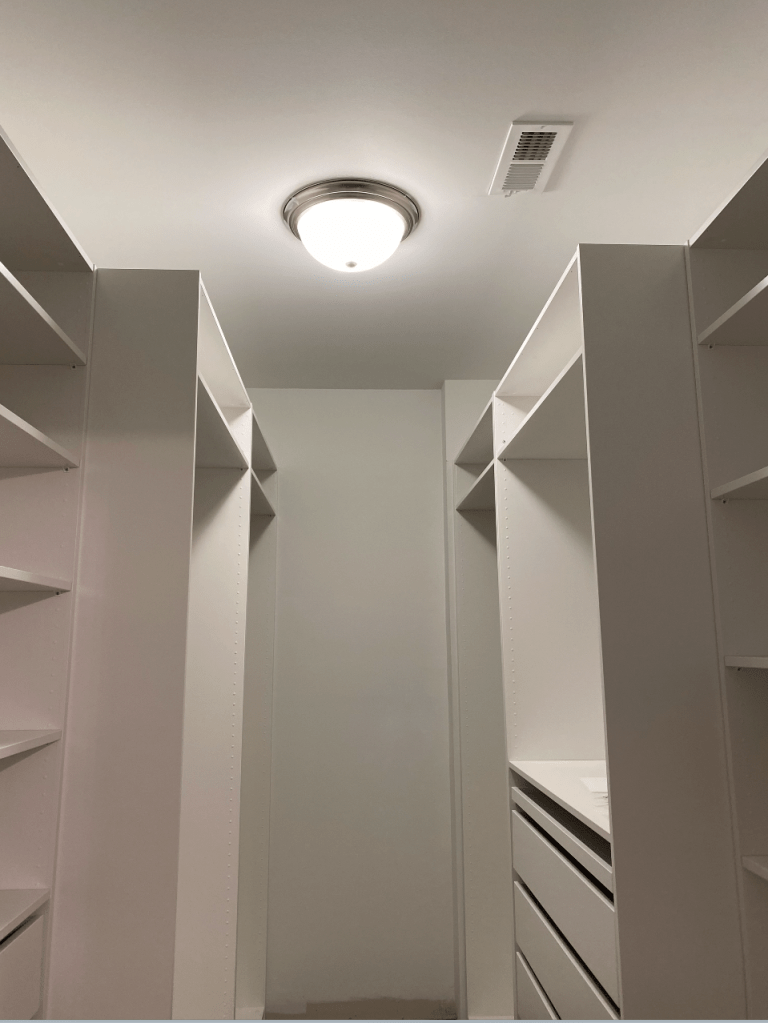
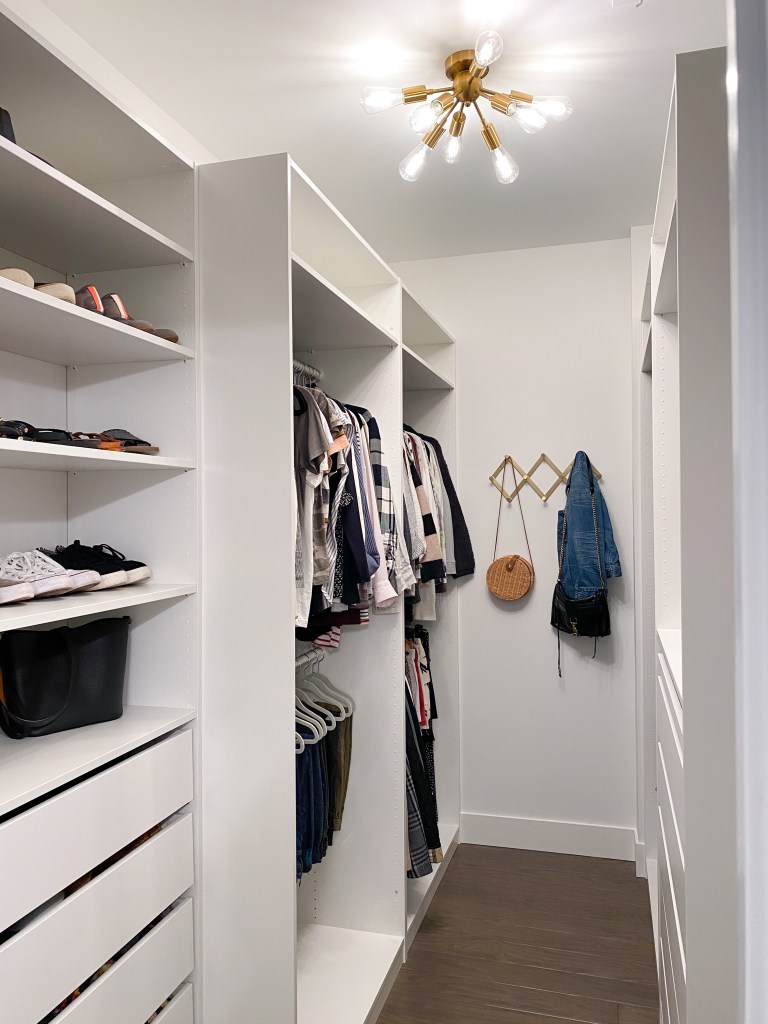
After that was dealing with the boob light (why are these still a thing?!) I wasn’t going to fully upgrade this closet without giving myself a fancy new light fixture! I ordered this semi flush mount from amazon, I love that it’s a mini version of our dining room chandelier, and coordinates well with our upgraded bathroom light fixtures!
You’ll notice here too that you can’t see the holes anymore, I decided not to fill each hole and repaint the cabinets, since that would require a lot more time and work and supplies! So I used the pegs that Ikea sells to fill the holes.. yes, all 1100+ of them.. But I think this turned out just fine! they aren’t completely flush, but they are nearly invisible, especially from a distance as you can see in this photo! (I only filled the ones you can easily see once clothes are hanging in those boxes, so just the front two rows and a few up at the top)
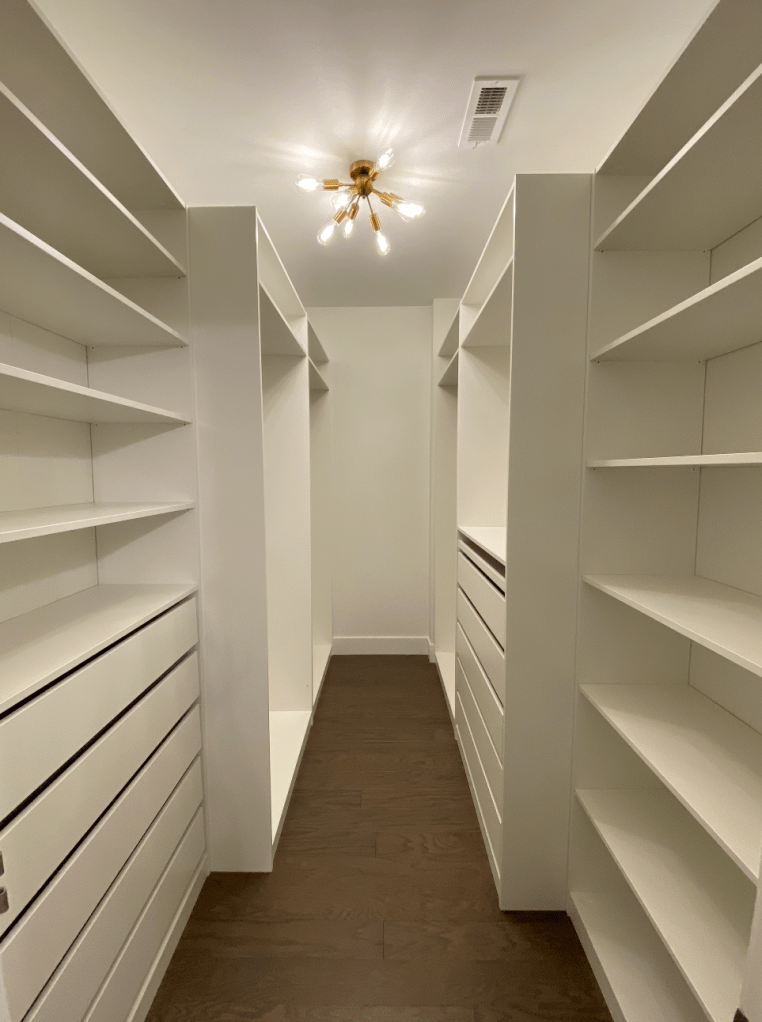
And then I spent the last afternoon organizing and filling it back up!! Here she is in all her glory! :
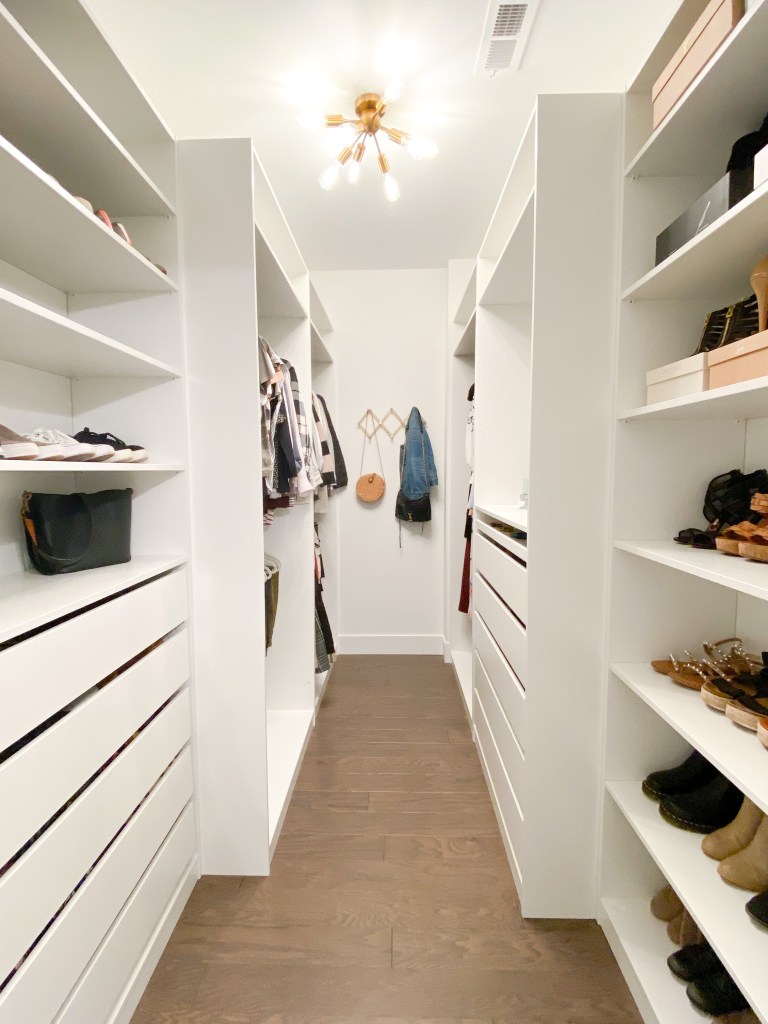
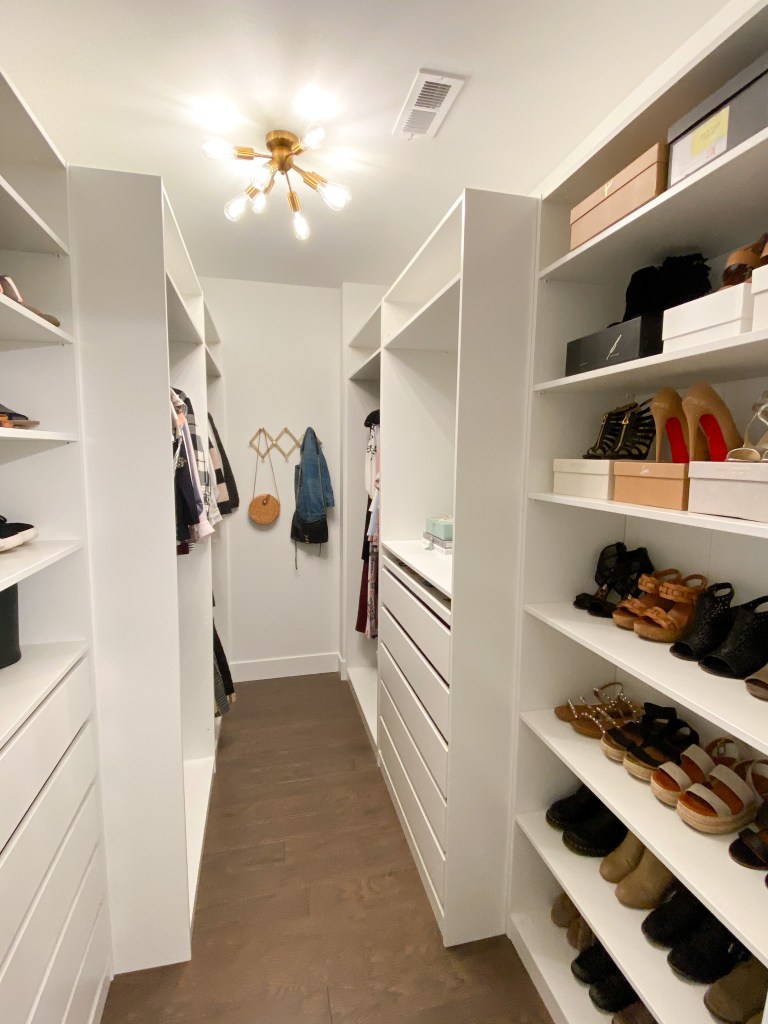
I love having all my shoes nicely displayed on the shelves right when you walk in, it makes such a fun statement!
Everything feels so organized, there’s a perfect place for it all! I actually gained MORE hanging space than I had before, even though it seems like its less! Nothing feels cramped and I was able to add my coats in here that have previously lived in the guest bedroom closet! I’m also so glad I decided to add drawers on the left side as well, it now holds all my scarves, extra small purses, travel gear, etc. There is the perfect amount of shelving for my overflow shoes and hats here as well! I don’t even have anything on the top shelves above the hanging bars! So extra storage room there as well!
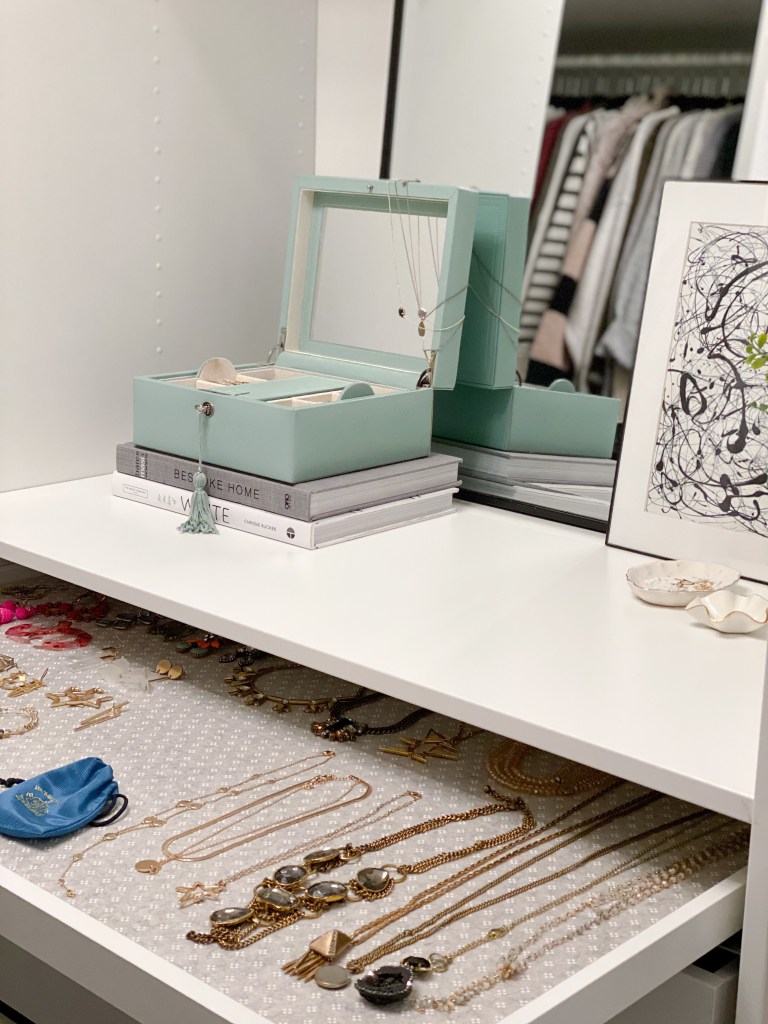
I was able to snag some drawer liners when I went back to the Ikea store one day as well, they were supposed to be out of stock both online and in store! So of course, at only $5 a piece a grabbed a few to use in the jewelry drawer until my insert arrives, and in the 13″ drawers to protect them from the bags/heavier things that are in there.
I am OBSESSED with the jewelry drawer, I’m so glad I decided to add this, and I can’t wait until the insert arrives! I also love that I have this landing zone with the mirror and a place for my jewelry box and a few small trays.
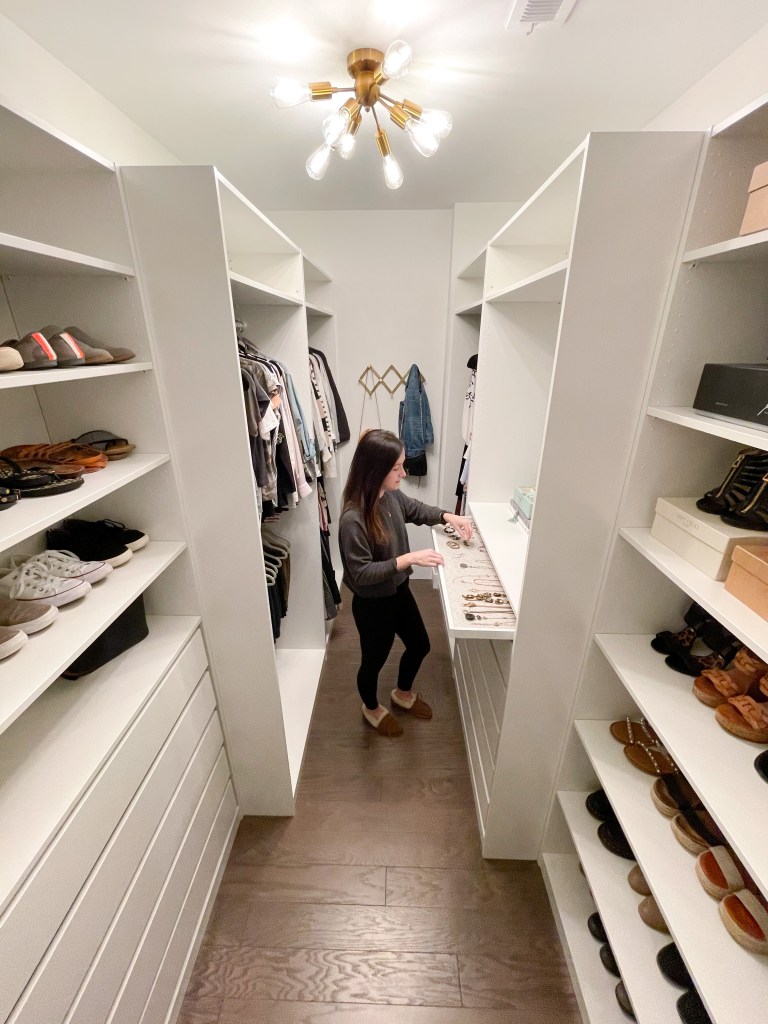
You can see here too that it really is more spacious than you think! i have plenty of room to stand and open drawers, pull stuff off hangers, and change easily!! I also added this cute accordion style rack on the back wall to throw the things I use often!
This has been my biggest project to date, and I am SO proud of tackling this solo! And landing around $1500 total, I would say this is absolutely worth it and has added so much value to our home! I hope you like it too, let me know what you think of the final product!
Be sure to check out my story highlight on instagram to see the full process as it happened!

looks great! excellent work
LikeLiked by 1 person
Thank you so much!!
LikeLiked by 1 person
Can you share the products you used for hole patches in the drywall? New homeowner here, so inspired by this transformation!
LikeLike
Of course! I like using the DryDex spackling! Lowe’s also has a kit version that has little patches for large holes too! then you just sand down after it’s dried with a light grit sand paper! https://www.lowes.com/pd/DAP-DryDex-8-fl-oz-White-Spackling/50125629
LikeLike
Great job! So much work but looks worth it in the end
LikeLiked by 1 person
Thank you so much! Yes lots of work but has been so great to have! Absolutely worth it! ❤️
LikeLike
Love this!!! Moving into new house this summer and I think I want to do this to my future closet. It looks a lot like your old one! Lol
LikeLiked by 1 person
It’s totally worth it! My storage and organization is so much better now!
LikeLike
Did you end up removing your closet door entirely? ( assuming your door opens inward) Curious to know if you did to know how you deal with that. Thanks!
LikeLike
Yes I did remove it! Have plans to remove the hinges on the door frame and fill them in so it’s just like an encased opening, but haven’t quite gotten around to that yet 😆
LikeLike
I already have built ins by another company that were here before we moved in. Just wondering if I can attach these drawers to these built ins as long as the measurements match?!
LikeLike
I’m really not sure! I know the ikea stuff has super specific attachments they use for their cabinets, do you know the brand of the original built ins? I would see if they offer drawers that can be added!
LikeLike
wow!! 94basement bath : install
LikeLike