
My husband’s office is on the basement level of our townhome, and as we started to get more settled in the house, we knew we wanted to do a cool shelving unit on a side wall to showcase all the books he has read and novelties he wanted to show off. (Like a frame that holds all our football game tickets to championship games, employee awards, pictures of me.. you get the idea)
The way the room is configured, we knew we did not want a large piece of furniture on this wall, as it is along the direct walkway from his office door to the back door to the yard, which gets used frequently because of the pups! So doing built in shelving was our best bet to get the look we wanted, without being too obstructive to the room.
And to give proper credit, I got this idea from Almost Makes Perfect blog, and adapted it to our needs! See their post here: http://almostmakesperfect.com/2013/04/29/diy-shelving/
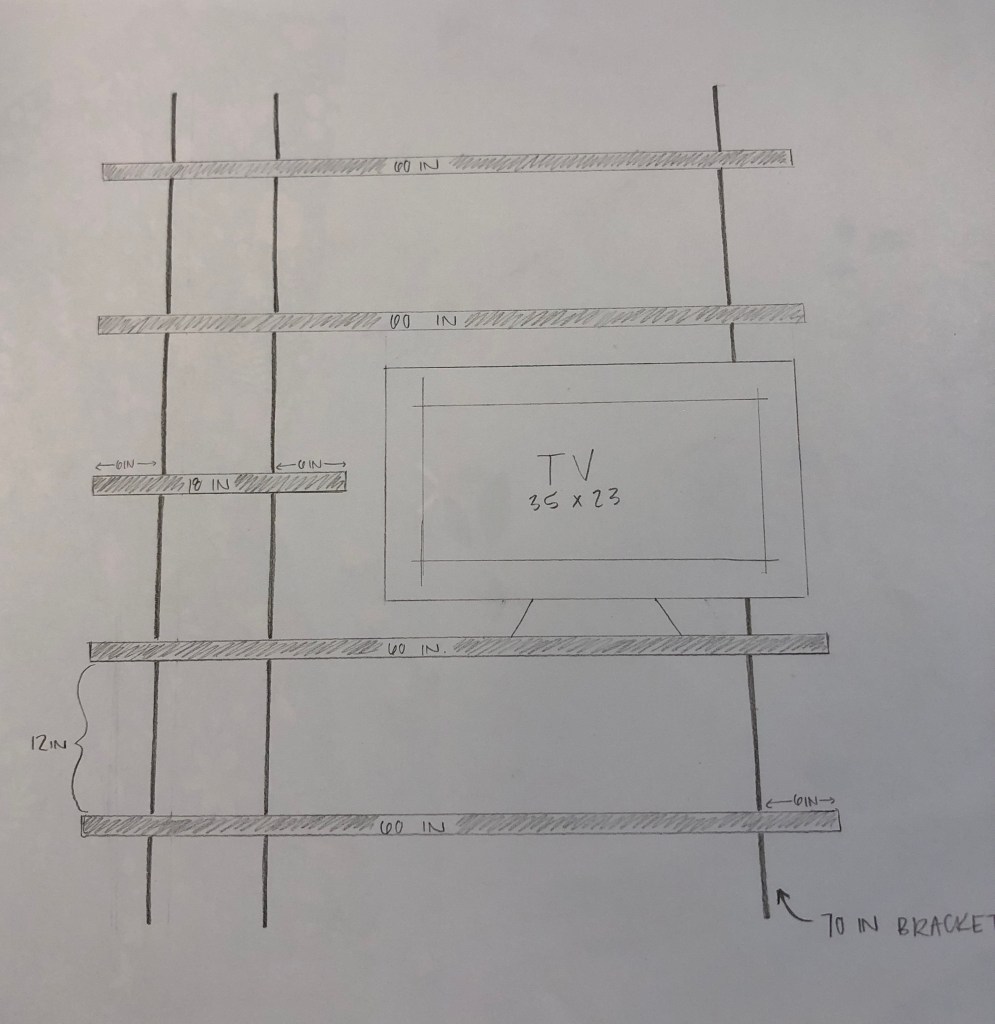
Here was my initial sketch layout of what I had envisioned in my head, to accommodate the TV and all
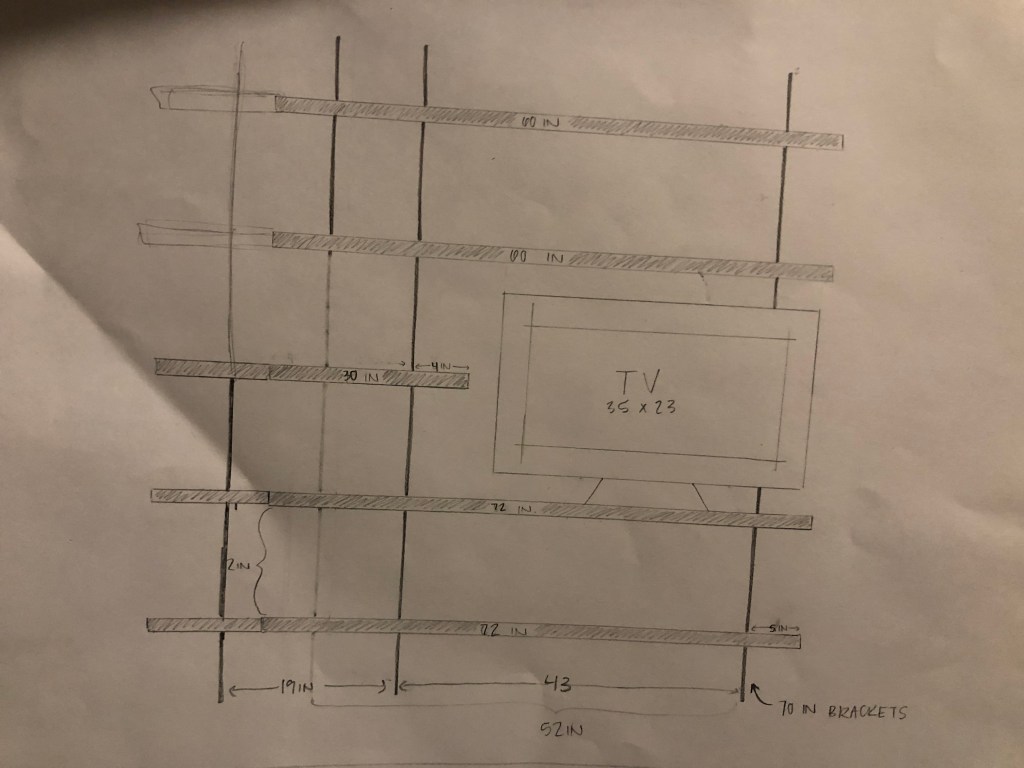
As we got going on the project and were measuring out where the studs were, I did a super professional adjust to my drawing to mark out our new measurements:
(wow, what a quality photo!)
Next step were the supplies! Here’s what you’ll need:
– three 70in track uprights (we chose black to tie into the rest of the house)
– 14 brackets
– four 72in x 12in pieces of wood for the longer shelves
– one 30in x 12in piece of wood for the short shelf
– wood stain
We were able to find 12in shelving wood at Lowe’s that is a nice sturdy wood, made for shelving and is smoother, more finished than some other types, and then cut these to the sizes we needed!
We mounted the 3 track uprights to the studs in the wall after measuring out and making sure everything would still fit/work like we wanted to, and thankfully it did! You can see here we had just placed the wood pieces on before cutting/staining to make sure they would work!
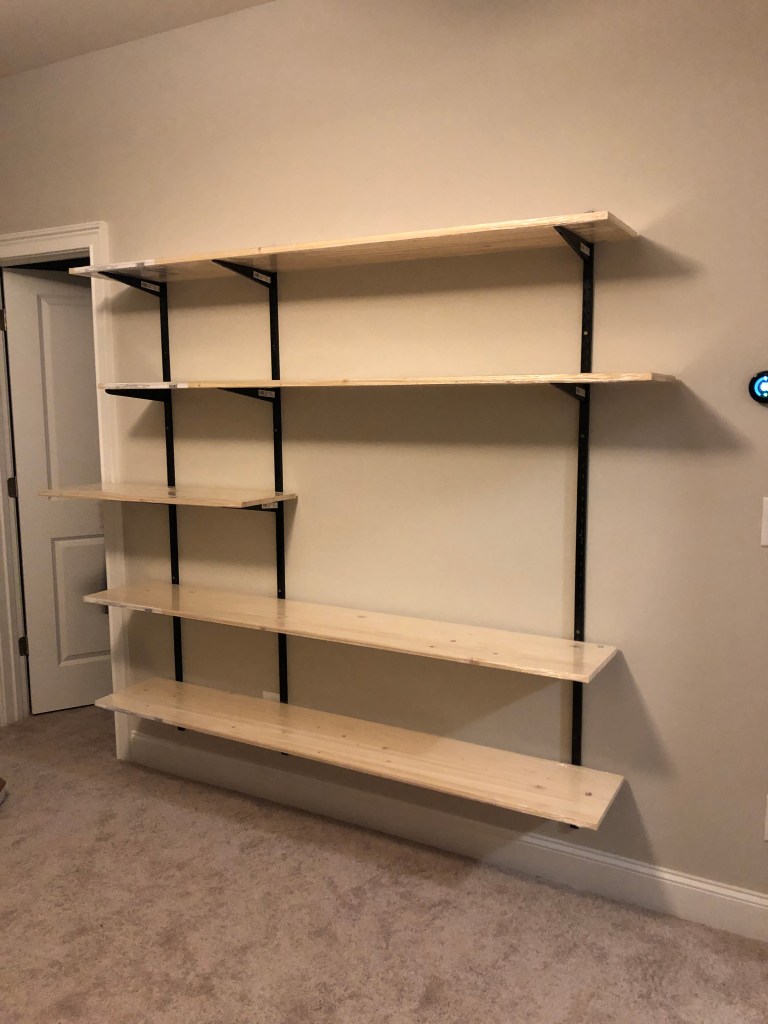
testing to make sure the TV fits, and it could hold its weight! (it totally can, these were very sturdy!)
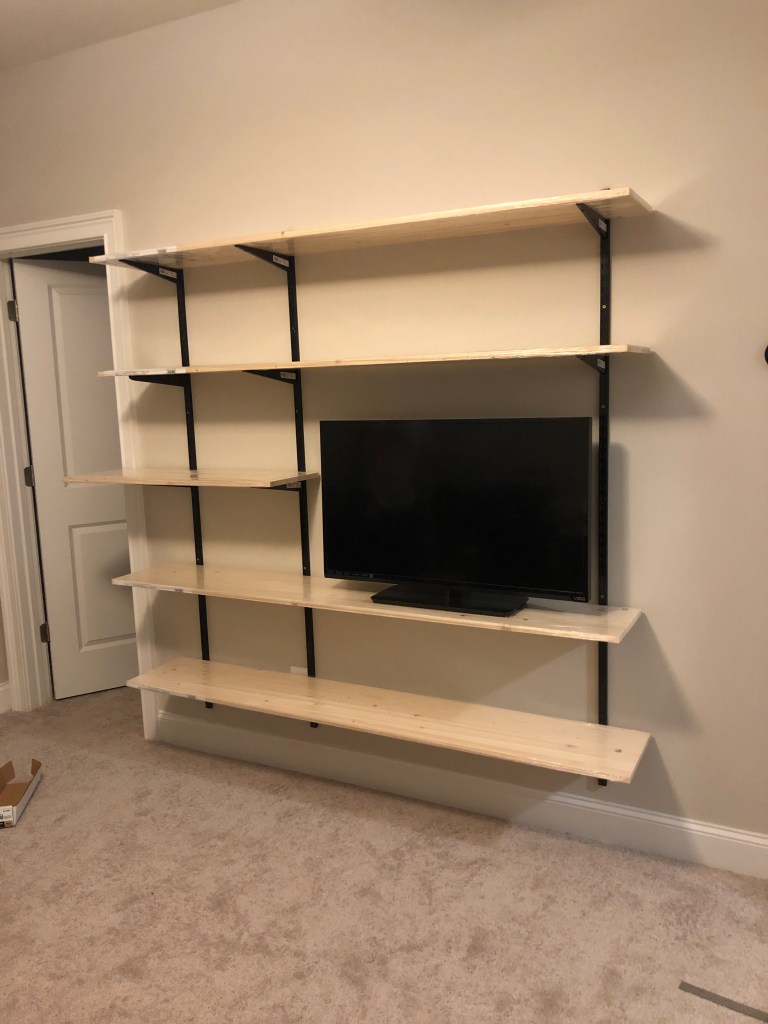
After staining, removing the most stubborn stickers off the brackets, and screwing the boards into place, we are so excited with how it all turned out!!
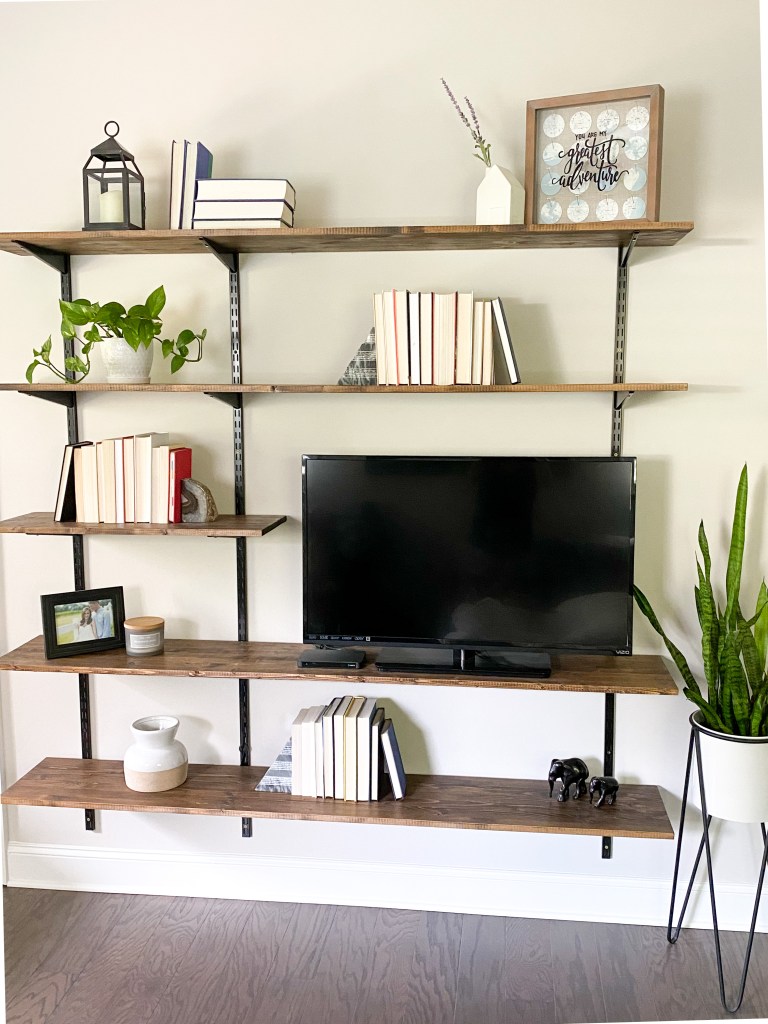
It really turned out so nice! We love that it gives this wall function and design, and isn’t in the way too the doors of the room. (also yes, we did replace the carpets to be hardwoods to match the rest of the house!)
