
When we bought our townhouse, the builder had just finished everything before we found the place, so we did not get to work with them to pick out our own finishes like a lot of lucky buyers get to do when they work with a new build neighborhood. Right away we noticed that there were just a handful of ‘updates’ that the builder put into this place, and a lot of typical builder grade things threaded through out! Which is fine honestly, because I firmly believe that living in a place for a while helps you decide what you really want and need to make your house a home!
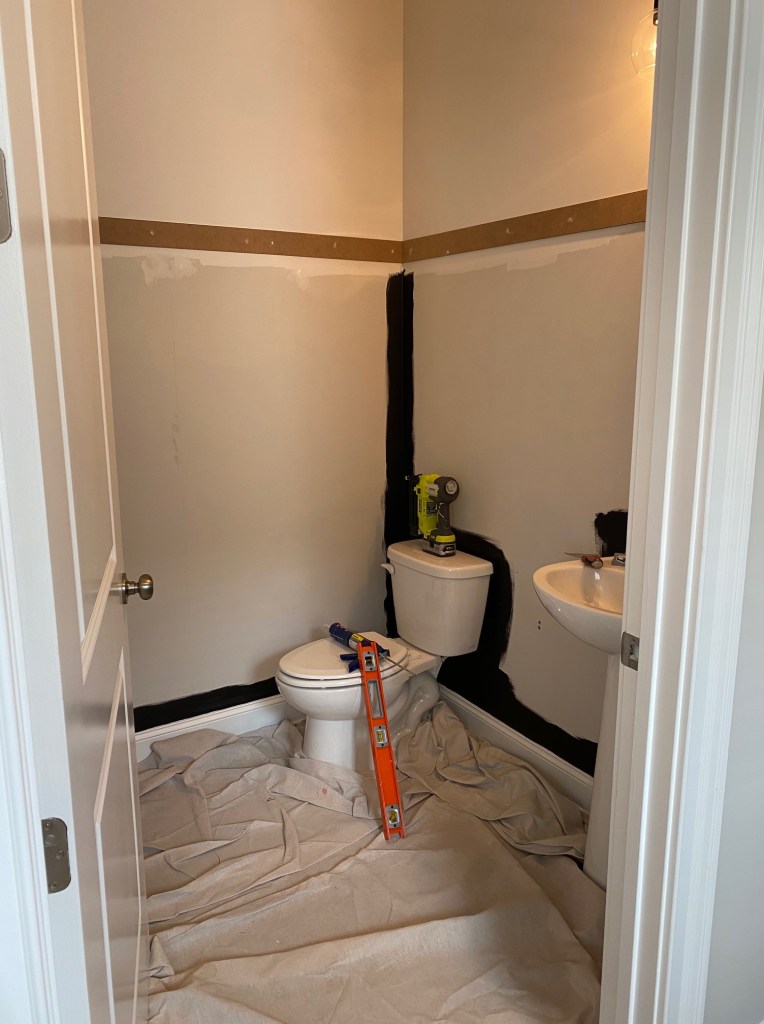
But it took literally ZERO time for me to know how much I hated our powder bath set up. Why do people even make pedestal sinks anymore?? They just get water EVERYWHERE, and there’s no storage for typical bathroom things.. (and who wants to see a stack of toilet paper just sitting out..)
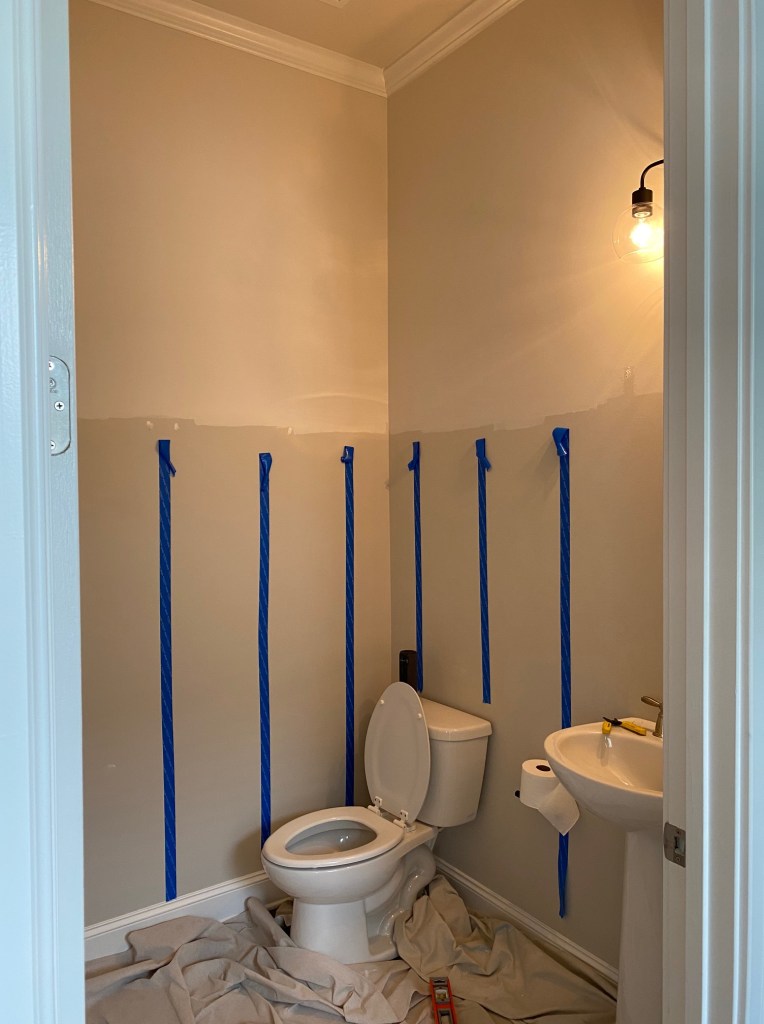
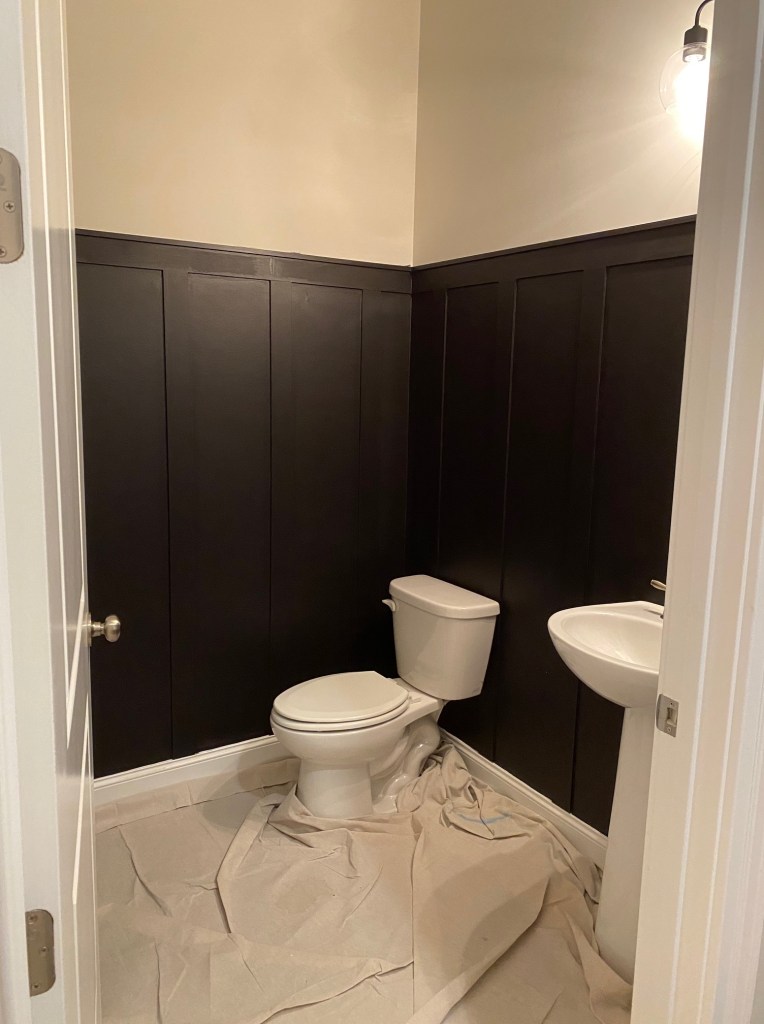
I digress.. here is how our powder bath sat for almost two years before we finally got around to tackling this project!
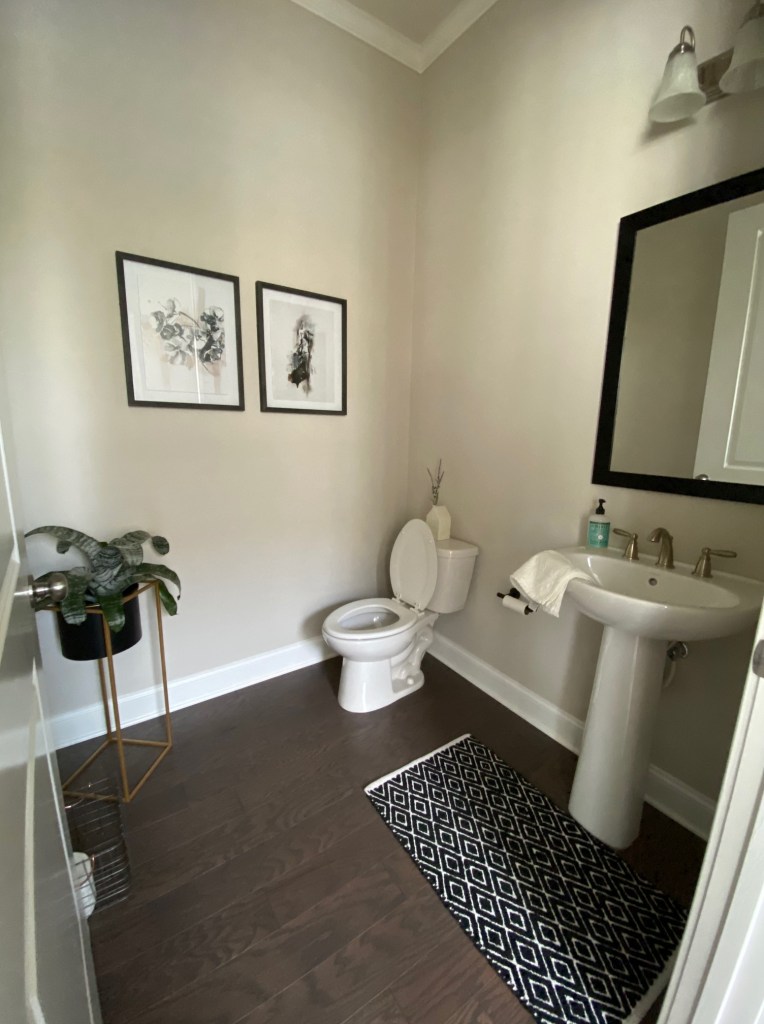
We have 10 foot ceilings on our main level, so this was just a tall white empty box of a space, with a tiny sink and a horrible light fixture.. (and this fixture is in all of the baths.. they will all slowly be replaced, another thing I hated right away when we moved in!)
After a lot of inspiration seeking planning, and researching; this is what I had envisioned for the space, to make it more impactful and purposeful!
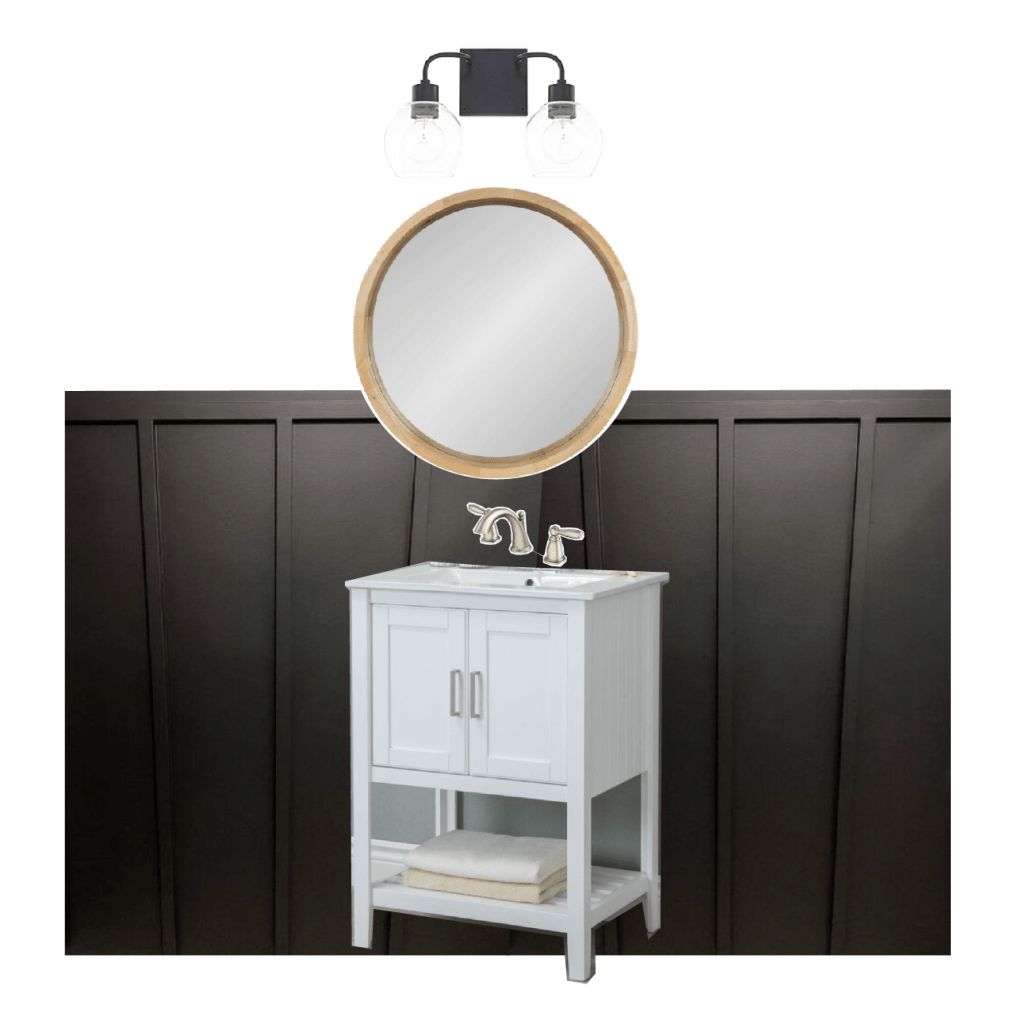
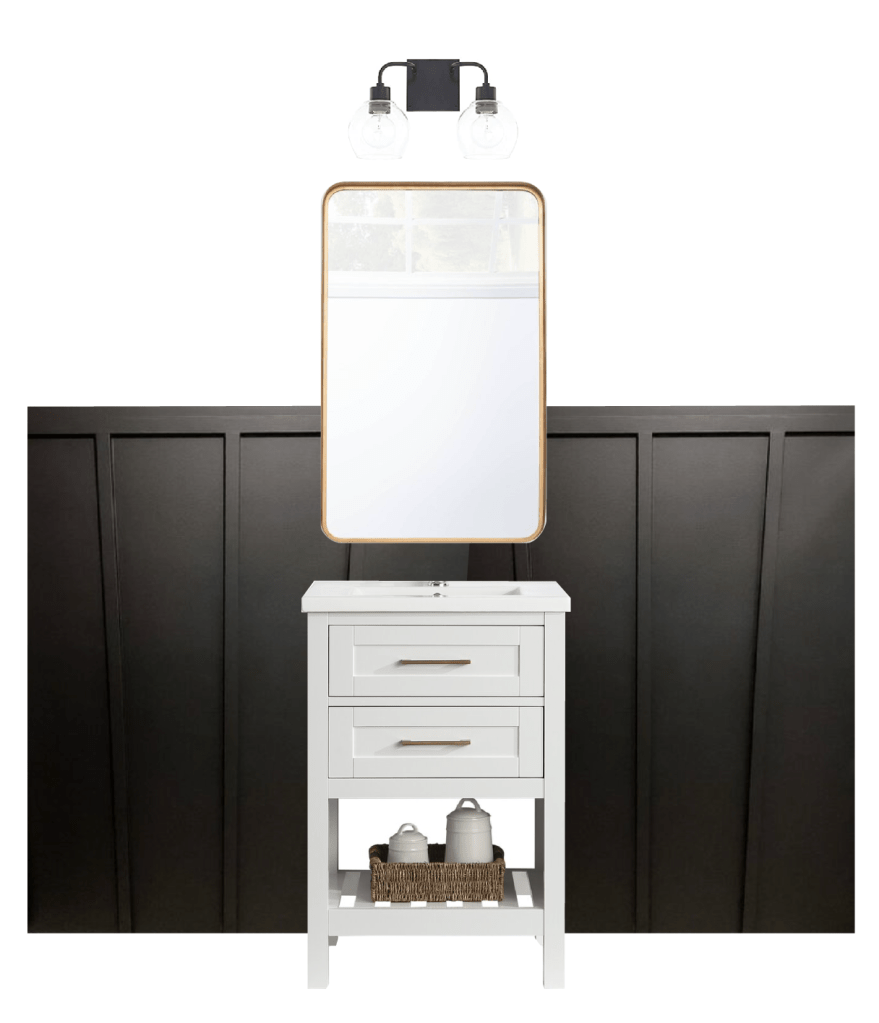
Originally I wanted to go with this wood mirror to tie into the wood from the dining room table, and the console that is right outside this bath. But then I found this amazing mirror from Target’s new Threshold with Studio McGee line, and I knew i wanted to make the space a little more elegant! I also chose a cleaner vanity with brass hardware.
So! Let’s get started on this thing!
We decided to go with a sheet of 1/4″ MDF board and cut them into 3″ wide strips to use for this project. We went this route because the top of our baseboards are only a quarter inch, and I didn’t want any weird overhang of the vertical boards!
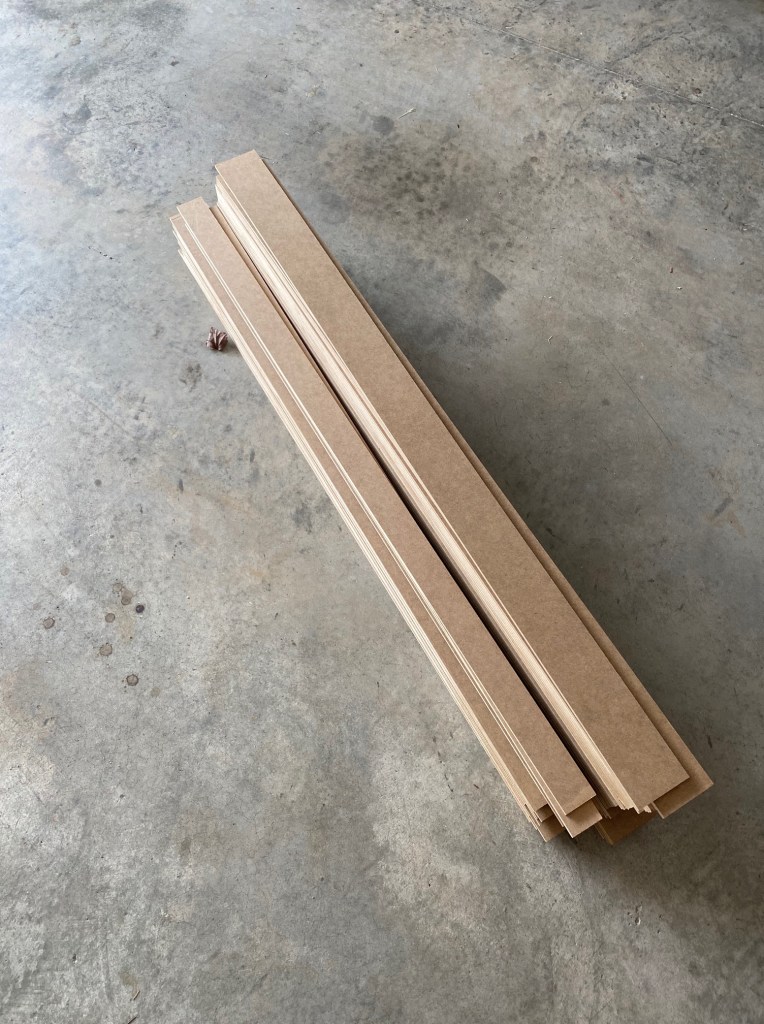
We used a table saw to cut the MDF into strips. Unfortunately, we could only find board that is 4ft tall, so we had to piece meal it together a bit! (explanation below)
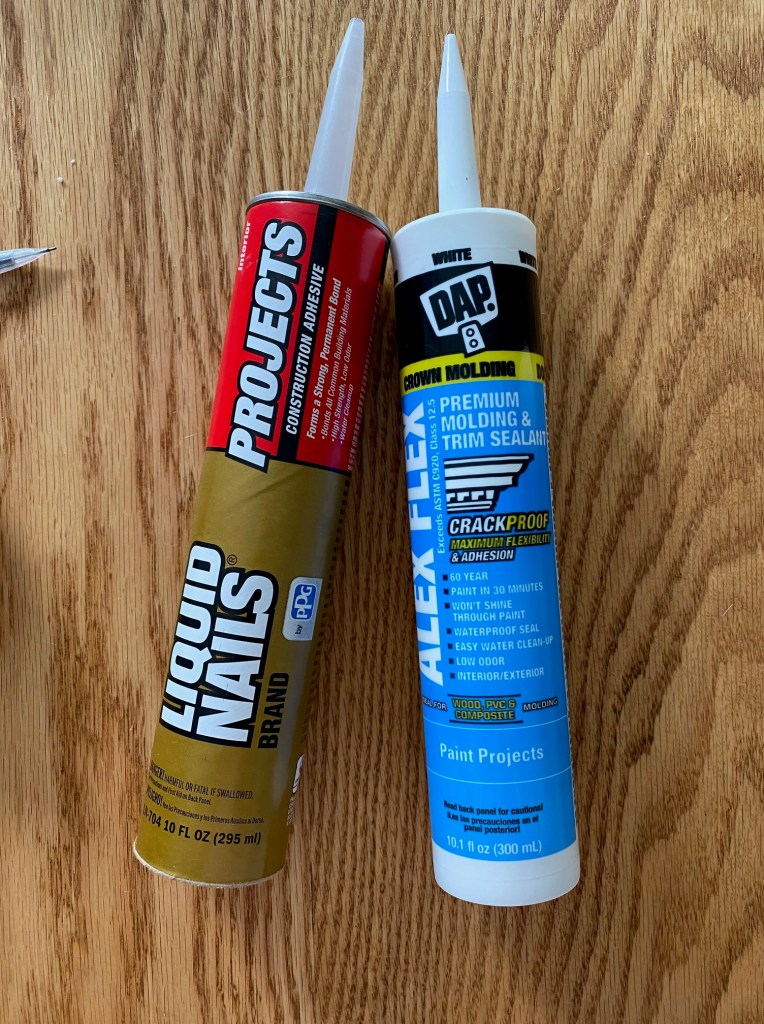
You’ll also need liquid nails, paintable trim caulk, a brad nailer, and a table saw!
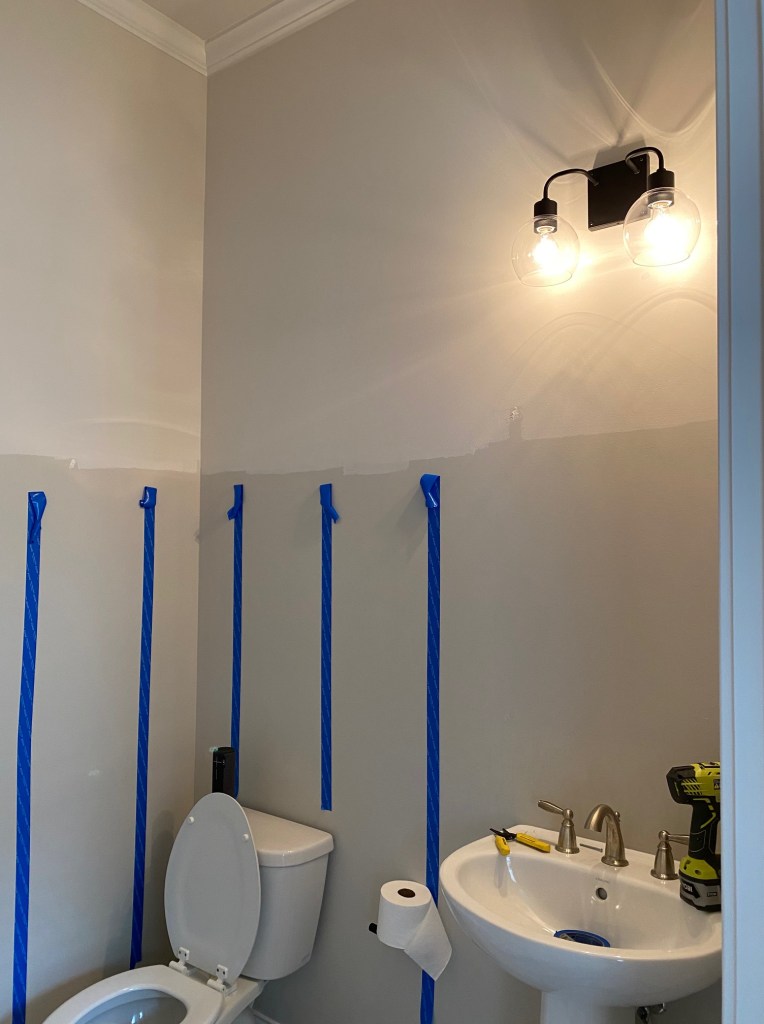
After measuring out where we wanted everything to be, first thing we had to do was paint the upper half of the all!
Every wall in the house is Agreeable Grey (standard builder grade grey… who knew?), and the ceilings are Aesthetic white, which is annoyingly close to the wall color. Quite possibly the warmest/greyest ‘white’ ever. Why didn’t the builder just paint the walls and the ceiling the same color? .. Okay sorry, I’m not annoyed at all.. I swear!
Anyway.. I didn’t want the walls to be two different colors, and the ceiling a third color, so we painted the walls the fake white to match the ceiling for a cleaner look! (and now I want to paint all our bathrooms this color, even though its not very different, it is cleaner!
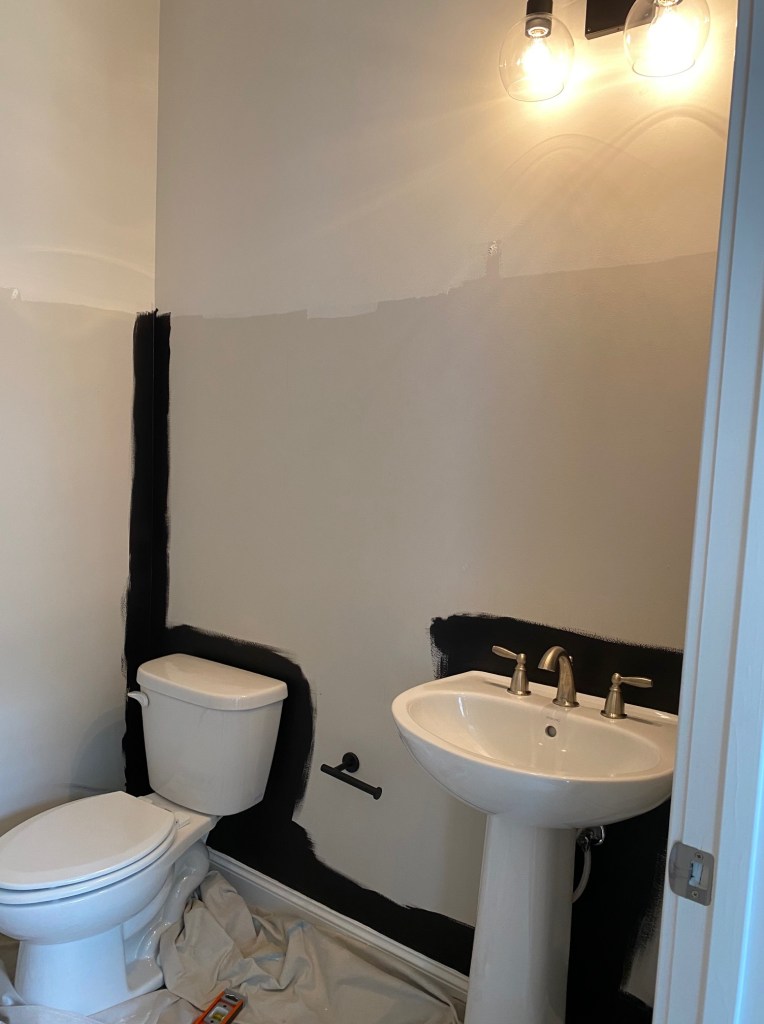
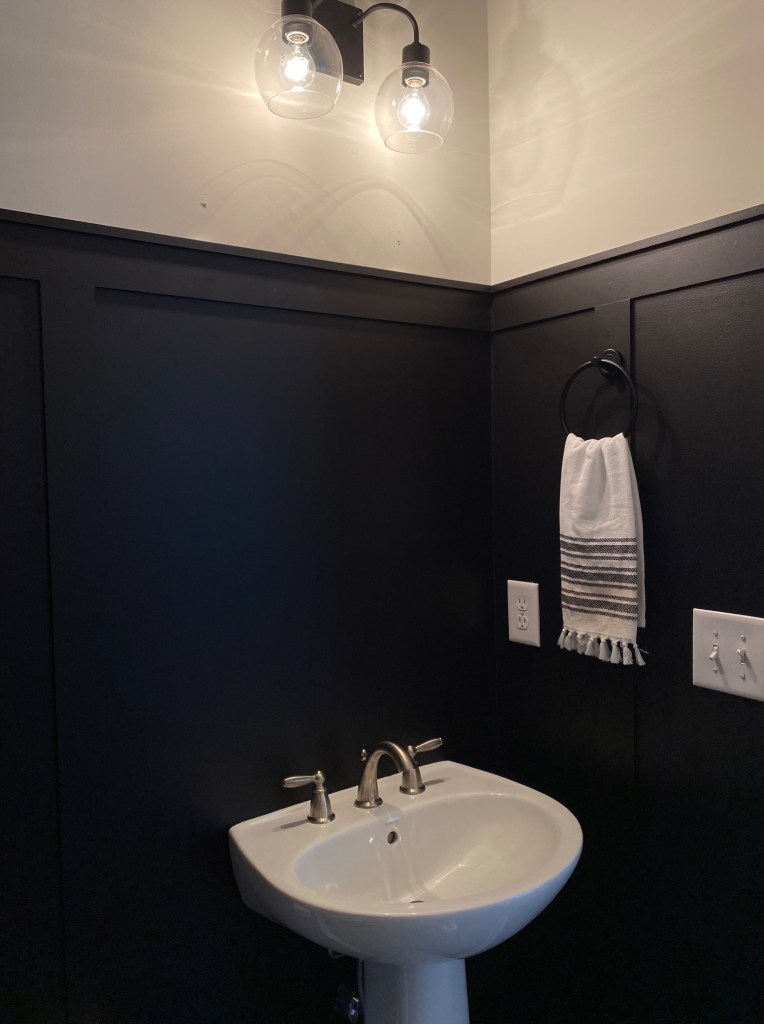
After that, we installed thew new light fixture (that I am fully obsessed with!), and I went ahead and trimmed out the black along the baseboards/behind the toilet and sink/corners.
Next, for the board and batten, we started by putting the top board at the 6ft mark (so the proportions would be a 60/40 on the wall), leveling out as we went. Don’t forget, since each board was 4ft long, we had to cut a second smaller piece to fill the remaining space. We did not do a 45 degree angle corner cut or anything fancy, knowing we would be caulking the gaps later.
Next for the batten! We did 5 boards along the back and side wall, spacing them out so the center of each board is 14″ apart (11″ between each board).
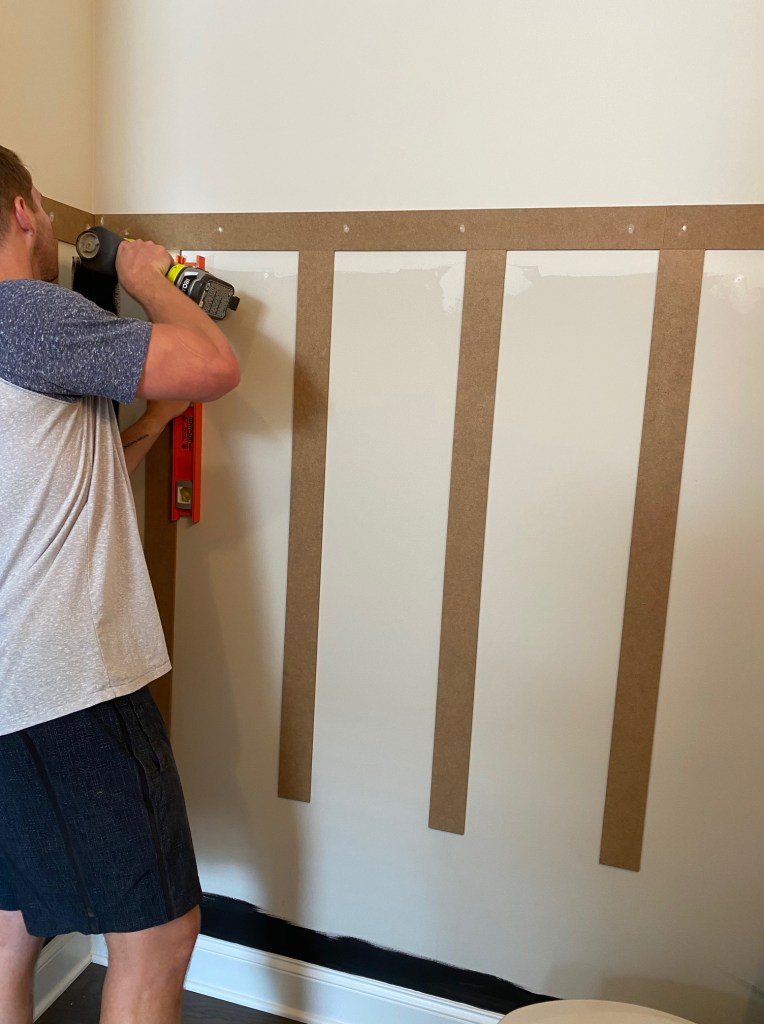
You can see here how the 4ft boards were not long enough, so after all the initial boards were mounted, we then cut the remaining to fill the space, just as we did for the top boards.

For the toilet wall, we opted to not put boards up that would be behind the sink/mirror. I’d seen a few ways people had done it where the boards ‘rested’ on top of the sink, and I just didn’t love that look! And knowing we would be replacing the pedestal sink soon, we opted against adding those at all. We did only 3 boards instead, measured out as if we were to have the 5 boards there to begin with, to match the other walls!
After we got all the MDF board up, I felt like we needed a trim at the top. I knew I wouldn’t be able to decide until this point, so we waited to buy it so we’d know what size we’d want!
We opted for a 1/2″ by 1/2″ trim piece that the hubs picked up from Lowe’s.. and thats as much as I know about it!
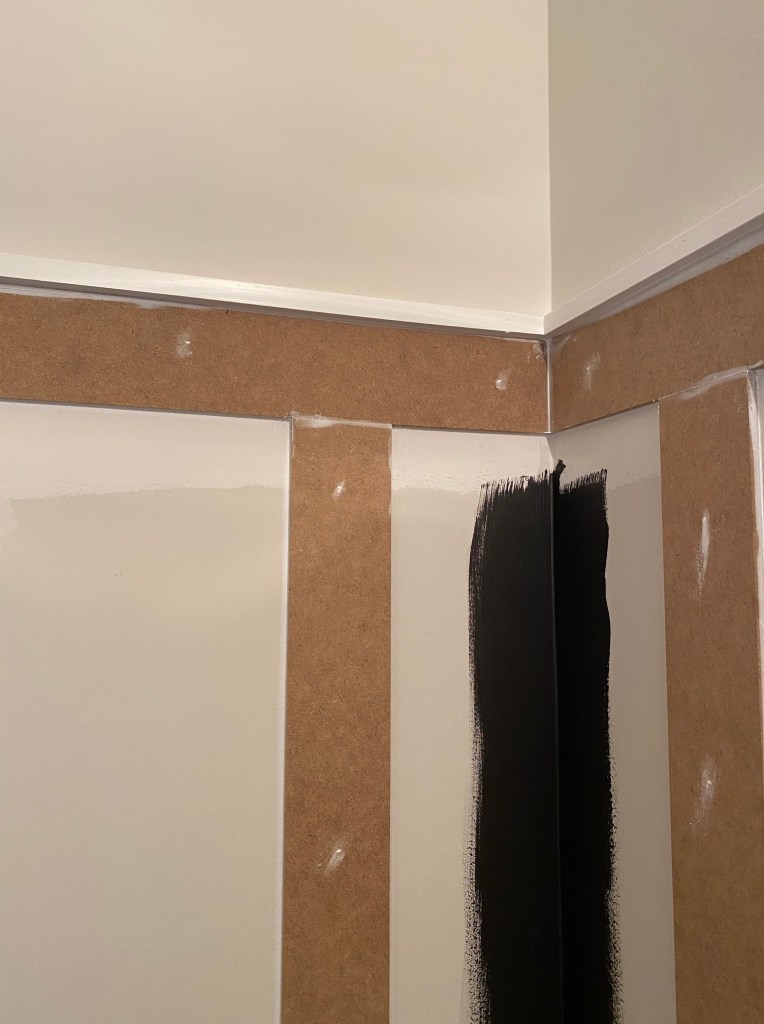
After filling all the nail holes, and caulking all the corners (which is much harder to do with 1/4″ edges, apparently), I used a paint brush to do a first coat on the MDF and trim.
The paint is Caviar by Sherwin Williams from Lowe’s, and I got the paint and primer in one! It was THICK, which was weird and a little tricky to work with, but we only needed two coats which was a win!
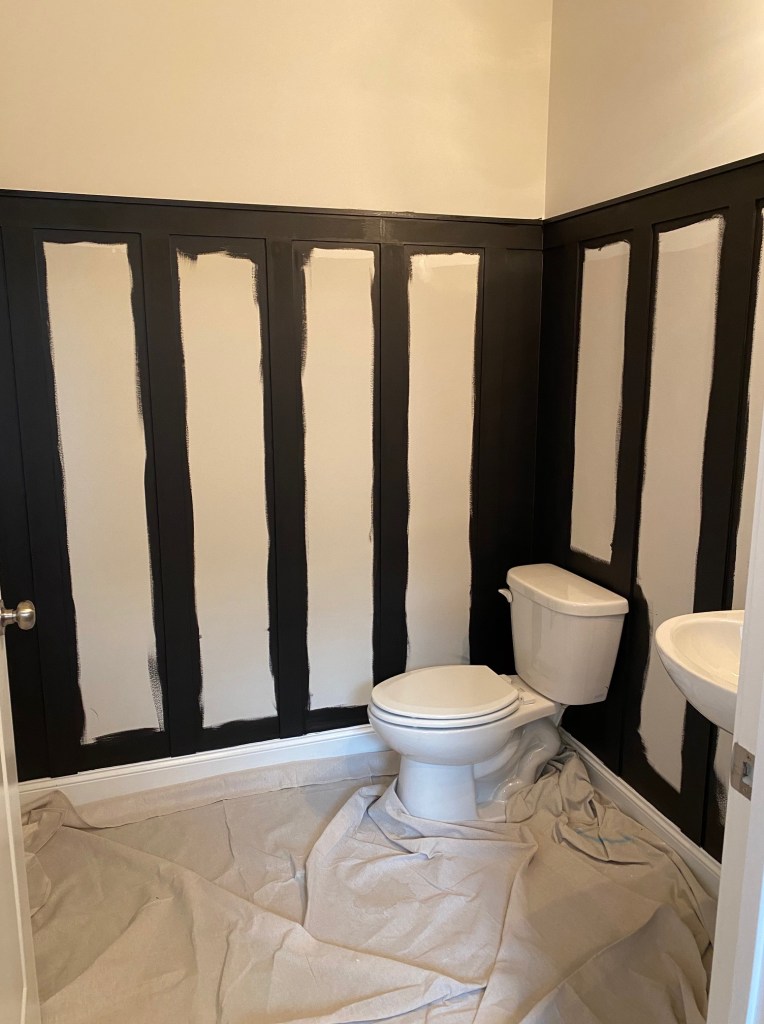
I was personally digging the jail cell vibe, but figured it probably wouldn’t be a great selling point one day ;D
Here is after the first coat, so dramatic and moody!
Here you can see where we ditched the two boards behind the mirror, and we did just a single board on the small wall by the door right in the middle of the trim and the other wall.
Next was to hang the mirror!
To make sure the mirror hangs ‘flat’ on the board and batten, and won’t kick out at the bottom, we added a 1/2″ wide board to the wall that I painted to blend, just in case you could see it from behind the mirror!
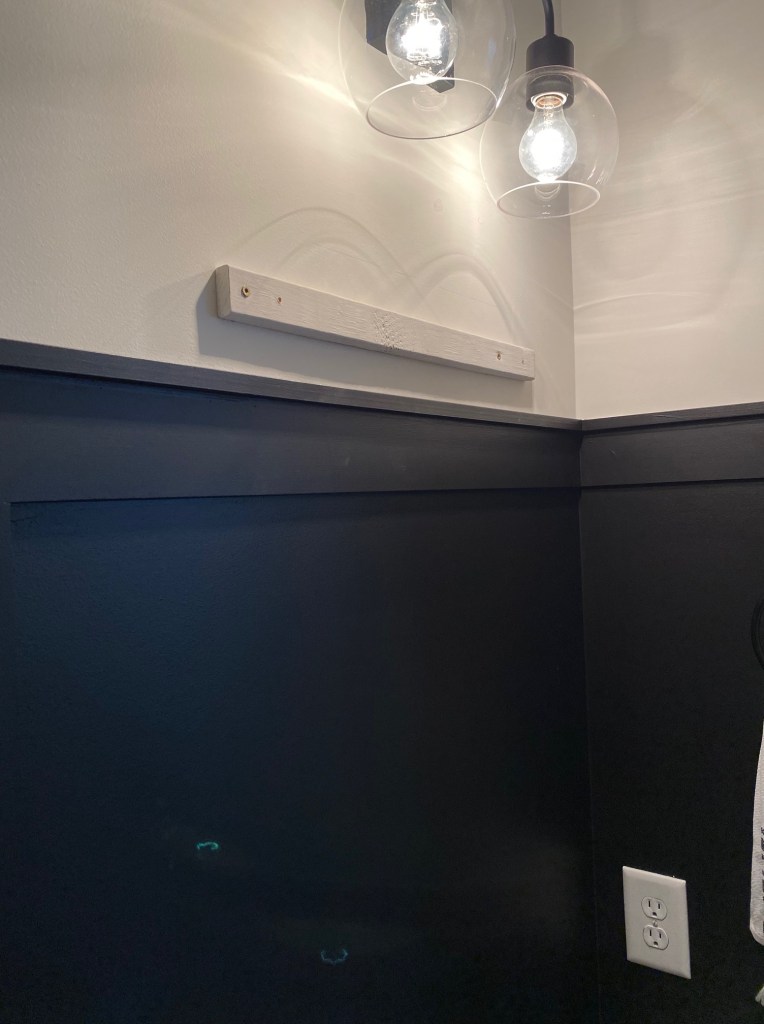
We screwed this into the studs, which thankfully could stay hidden behind the mirror, and not interfere with the screws needed to hang the mirror. You can see the marks we made for the mirror to be hung into the board above.
I love how the gold turned out on the black wall!
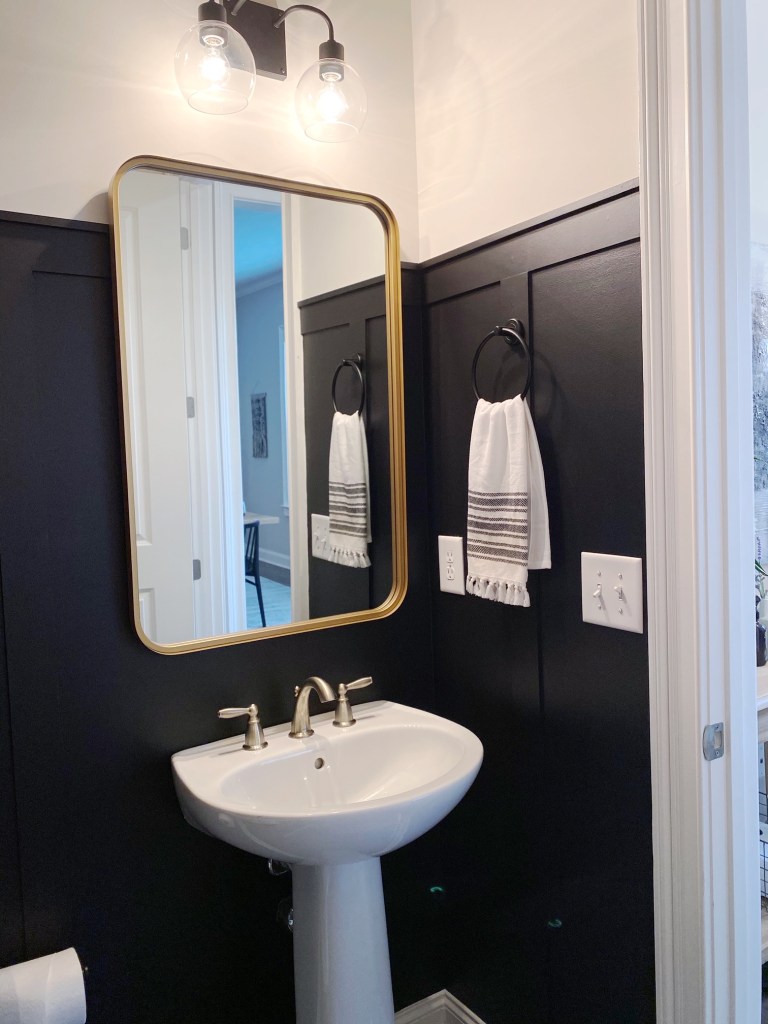
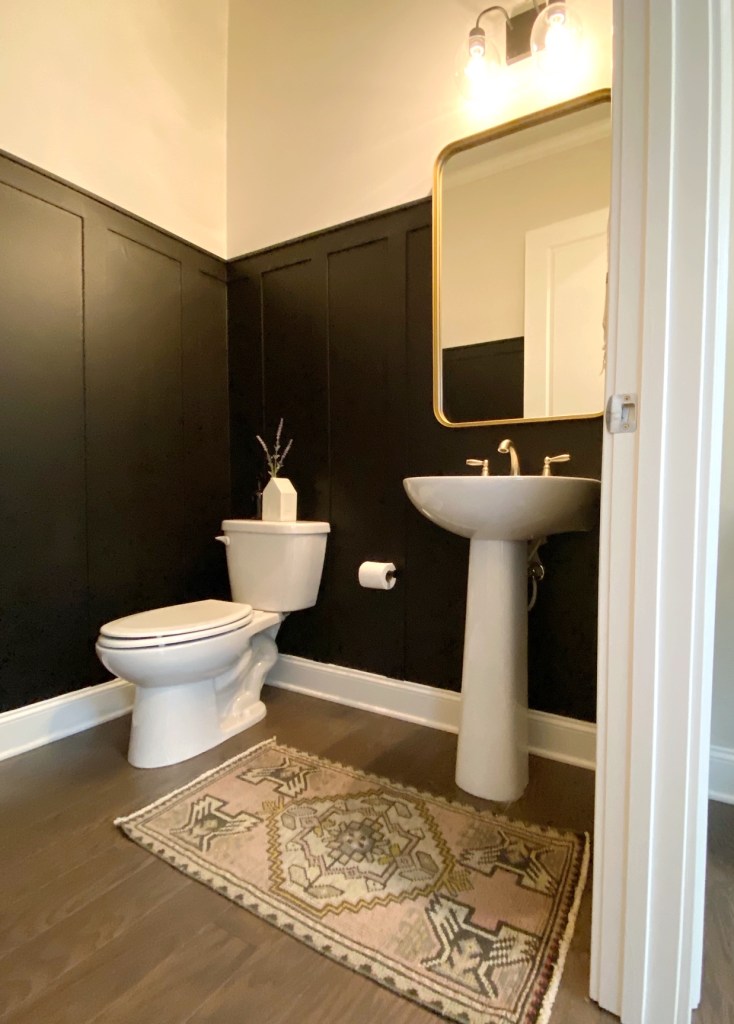
And here is the final product!!! I literally could not be more in love with it, and wish we had done it sooner!!
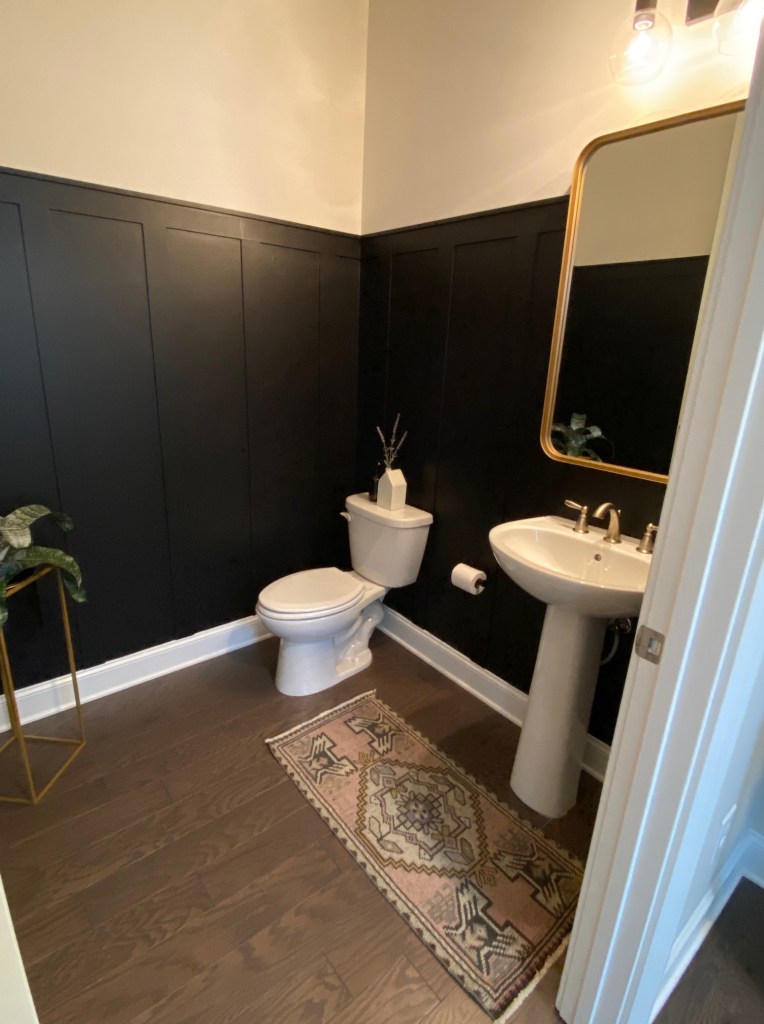
I added this amazing vintage Turkish rug that I got from a local rug vendor, and i just love how it ties the room together. The gold mirror is the perfect size for the space, and the new light fixture is much more modern and appealing!
I’ll post an update once we get the new vanity installed, but I am so proud of us for tackling this ourselves!
… and now I’m trying to decide where else we can do board and batten in the house with all our leftover MDF boards! stay tuned!!

1 Comment